

Creating a New Case in Dynamics CRM
Simon Phillips, 15 February 2011
In my last post I did a brief overview of the Case Management solution built into Dynamics CRM. In this post I will go over the steps to create a New Case and some tips and tricks that may help you out in the creation process of a case. There are two options available to create a Case, these are - navigating to cases in the service module and creating a case from an activity. I will cover both of these now.
To Create a New Case from the Service Module:
You are the manager of an electronics store and have a customer, Fred, walk into your shop with a problem with a product he purchased from you last week. In a situation such as this you will want to quickly record all of the information Fred is giving you and therefore should create a case directly in the Service module. Follow the steps below to do this:
1. On the Navigation Pane, click on Services and then click on Cases
2. On the ribbon click on the new icon ![]()
Out of the box there are only 3 required fields:
Title: The title of the case(the more descriptive you make this the easier it will be to find later on)
Customer: The Contact/Account you are creating the case for
Owner: This should prefill with the currently logged in user
Tip 1. Use the form assistant to quickly help you find the record you are after.
Tip 2. If you know the name of the record you are after just type it in and tab out to fill the lookup.
3. Fill out any further information that you may know
Tip 3. The more information that you fill in the better, as it will assist in reporting and the overall management of the case.
4. Open up the Notes and Article section
a. Notes: Click on Add a new note… to add any additional info about the case
b. Knowledge Base Article: here you can link the case to a knowledge base article, this knowledge base article can help you solve the customers issue or provide the solution/workaround
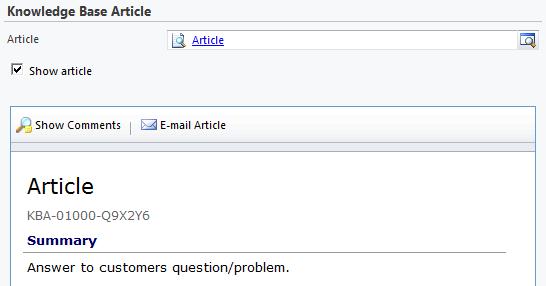
Tip 4. To view the article you just added click on the Show Article check box.
5. Finally click Save and Close
To Create a Case from an Existing Activity:
On a different occasion another customer, Mary, sends you an email complaining that only after a few days after she had purchased some headphones from you they had stopped working. In this case you can record the email as an activity in CRM and then create a new case from this activity. Here’s how to do this:
1. First of all you would want to track the email in CRM (if you are using the CRM outlook connector)
2. Either from within outlook or on the web client click on Workplace and then click on Activities (if you are doing this from outlook you can just open the email)
3. Open the activity that you wish to convert to a case (this will work for all activity types even custom ones except for campaign response) Nb. From within outlook you can skip this step
4. On the open form click on the To Case button Nb. To find this button in outlook just click on Convert to.
5. This will prompt you to select the customer the case is for and a subject
6. When the case is opened the title will be prefilled with the subject of the activity, also the customer will be prefilled with the customer that called you in the phone call activity.
7. Click OK to continue to the case form to fill out any further details, refer to above steps for this process
So next time you have a customer who has an issue or question about something you can now track and answer this with the use of a case.
Category List

Filter by Author
Adam Murchison
Alfwyn Jordan
Arthur Mandisodza
Calum Jacobs
Colin Maitland
David Mochrie
Dominic Liu
Gayan Perera
Harshani Perera
Isaac Stephens
Jaime Smith
Jared Johnson
John Barrencechea
John Eccles
Lauren Withers
Paul Nieuwelaar
Roshan Mehta
Roz Millar
Ryan Blaikie
Ryan Ingram
Sarah Coleman
Sean Roque
Shalane Williams