

New Timer Controls in Dynamics CRM
Roshan Mehta, 02 September 2014
This is another extremely handy feature! The ability to add a timer to forms inside CRM will help keep you on top of your day-to-day tasks and also gives you an indication of success or failure. In this post, we will take a look at how we can use timers to ensure that phone calls are completed on time.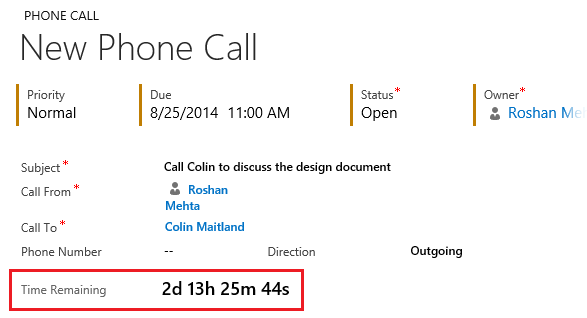
The screenshot above shows a timer on the Phone Call form, and no this is not a custom component. The form designer now gives you the ability to add a timer to the form and configure some settings which defines how the timer should behave. Let’s take a look at the configuration.
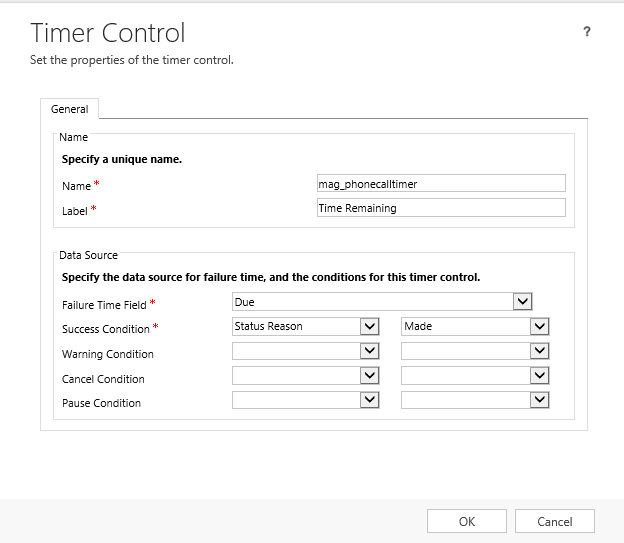
On the form designer, click on the Insert tab and select Timer.

Enter a Name and a Label for the timer. The options under the Data Source section define the fields and conditions that should be looked at to identify different states for the timer. For example, the timer should display a failure if the Due date has passed and should show a success if the Status Reason has been set to “Made”. You can also configure conditions for warnings, cancellations and pauses.
Now that I have the timer set up, I can simply save the form and publish customizations. When I create a new Phone Call record and set the Due Date field, the timer automatically begins counting down when I tab off the field.
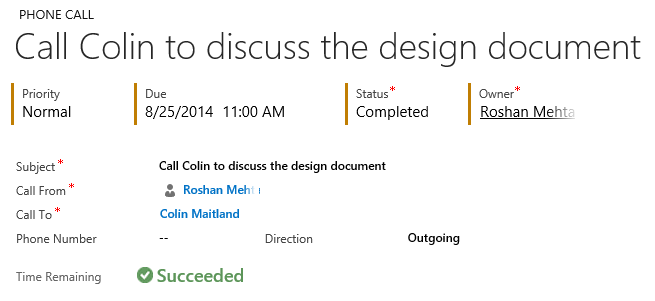
Assuming I have completed the Phone Call before the due date has passed (i.e. the Status Reason = “Made”), the timer control will show a success message.
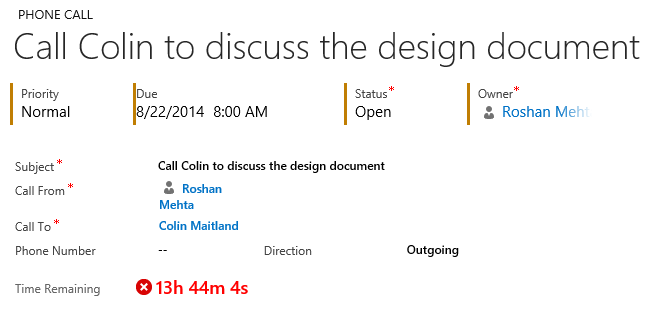
Had I not completed the Phone Call within the allotted time, the timer will continue counting down and will be highlighted in red.
We have seen how timers can be added to main forms for entities and they can also be added to Quick Create and Quick View forms using the same configuration process.
Category List

Filter by Author
Adam Murchison
Alfwyn Jordan
Arthur Mandisodza
Calum Jacobs
Colin Maitland
David Mochrie
Dominic Liu
Gayan Perera
Harshani Perera
Isaac Stephens
Jaime Smith
Jared Johnson
John Barrencechea
John Eccles
Lauren Withers
Paul Nieuwelaar
Roshan Mehta
Roz Millar
Ryan Blaikie
Ryan Ingram
Sarah Coleman
Sean Roque
Shalane Williams