
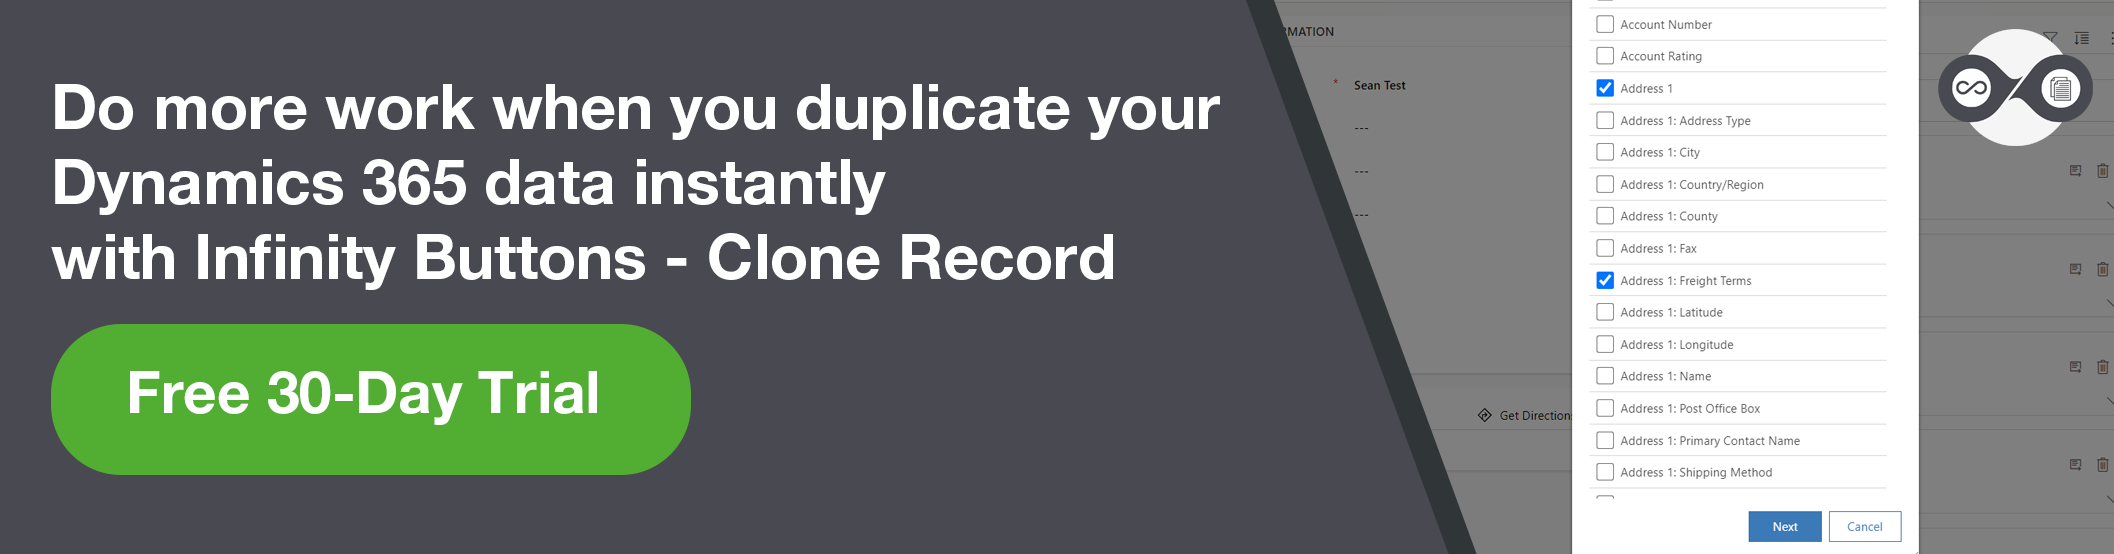
Installing the CRM 2013 Email Router
Roshan Mehta, 17 September 2013
The installation process for the CRM 2013 Email Router is exactly the same as the CRM 2011 Email Router. In this post, we will take a look at the CRM 2013 Email Router installation process. Note that this installation is for the CRM 2013 Beta edition and the installation process may have changed with the final release.
Step 1 – Extract Files
In this step, I have created a new folder on C drive called CRM Email Router which will hold the extracted installation files.
.png "Installing the CRM 2013 Email Router (1)")
Step 2 – Get Updates
It is recommended that you get the latest installation files before proceeding with the Email Router installation.
.png "Installing the CRM 2013 Email Router (2)")
Step 3 – Accept Licence Agreement
.png "Installing the CRM 2013 Email Router (3)")
Step 4 – Install Required Components
The setup program will inform you of any software perquisites for the Email Router. If you haven’t already installed these, the setup program will download and install them for you.
.png "Installing the CRM 2013 Email Router (4)")
Step 5 – Select Router Components
In this screen, select the components you wish to install for the Email Router. You can optionally install the Rule Deployment Wizard to setup forwarding rules for a Forward Mailbox in Exchange.
.png "Installing the CRM 2013 Email Router (5)")
Step 6 – Select Installation Location
You can choose to install the Email Router files in a different directory to the default one specified.
.png "Installing the CRM 2013 Email Router (6)")
Step 7 – System Checks
The setup program will perform a series of system checks. If there are any errors, you must correct them before you proceed with the installation of the Email Router.
.png "Installing the CRM 2013 Email Router (7)")
Step 8 – Ready to Install
This screen provides a summary for the Email Router configuration that you have specified in previous windows. Click on Install to proceed with the installation.
.png "Installing the CRM 2013 Email Router (8)")
As you can see, the installation is exactly the same as the CRM 2011 Email Router installation. Very easy!
Category List

Filter by Author
Adam Murchison
Alfwyn Jordan
Arthur Mandisodza
Calum Jacobs
Colin Maitland
David Mochrie
Dominic Liu
Gayan Perera
Harshani Perera
Isaac Stephens
Jaime Smith
Jared Johnson
John Barrencechea
John Eccles
Lauren Withers
Paul Nieuwelaar
Roshan Mehta
Roz Millar
Ryan Blaikie
Ryan Ingram
Sarah Coleman
Sean Roque
Shalane Williams