

Displaying a Bing Map in Dynamics CRM 2011
Roshan Mehta, 23 May 2011
Many Dynamics CRM users in different industries rely on integrations with other systems and services to diversify their CRM implementations. A popular example of such integration is displaying a Bing Map inside CRM.
Companies tend to use this integration for a number of reasons such as to obtain a visual representation of their client’s geographical locations, display the driving directions for delivering orders, or to perform distance/time calculations for various routes. Although this is possible in Dynamics CRM 4.0, it is now a lot easier to achieve a basic integration in Dynamics CRM 2011.

In Dynamics CRM 4.0, a popular way to display a Bing Map inside CRM is to create a custom ASPX page to host the Bing Map, and then add a link to the navigation pane by modifying the Site Map XML. This allows us to utilize the available space within the CRM workplace so we can maximize the size of the map.
If we ignore the actual creation of the custom ASPX page to host the Bing Map, there is still a bit of complexity involved with this approach as you need some knowledge of XML in order to add the custom link to the Site Map.
Adding this functionality into Dynamics CRM 2011 is much easier. Again, we’ll ignore the actual creation of the Silverlight Control for the Bing Map, however, we do not need to know any XML to display the map inside CRM 2011. All we need to do is use the Dashboard feature and customize its layout so we can maximise the size of the map.
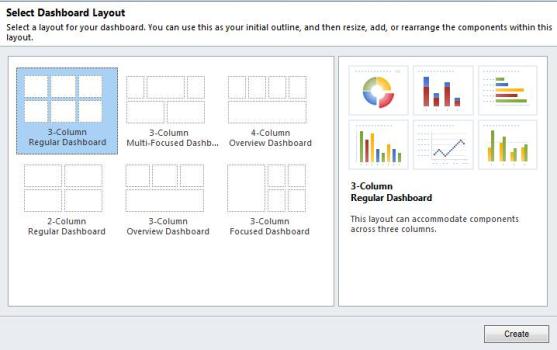
Firstly, I have created a new dashboard by clicking on the New button on the Dashboards ribbon. The following window will appear where you can select a dashboard layout. It doesn’t matter which layout we choose since we’re going to customize it to show a single component.
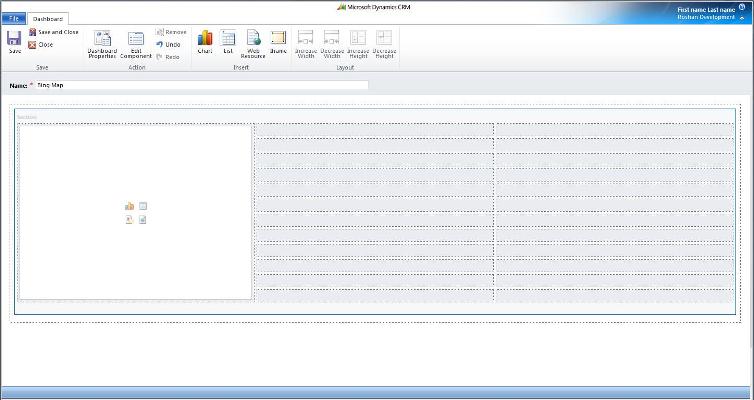
After we click on Create, we can see a blank dashboard with multiple rows and columns. We can click on a section of the dashboard and click on Remove so we are left with only one section to host our map. It should look something like this.
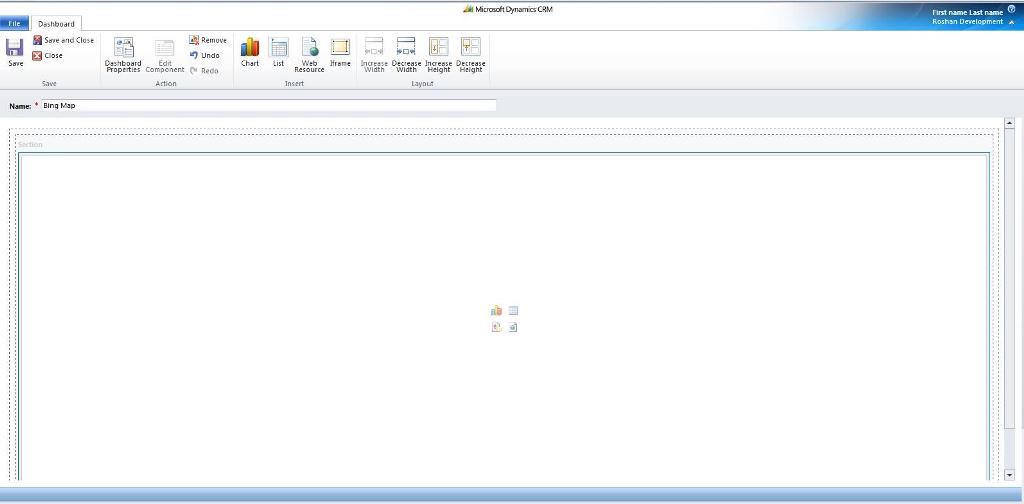
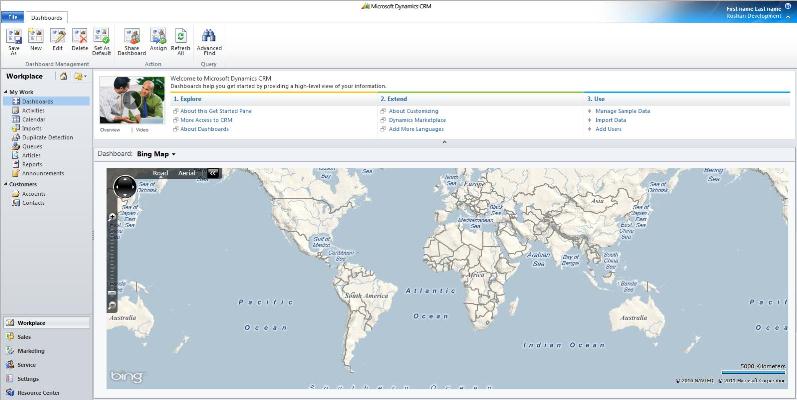
Now we can click on the Increase Height and Increase Width buttons to utilize as much space as possible. The final result should look like this.
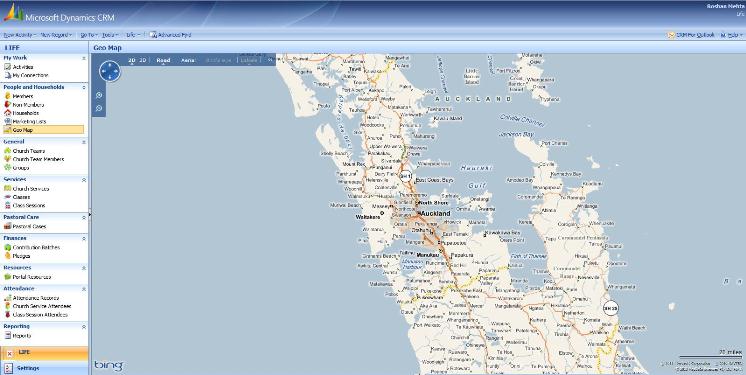
All that’s left is to add our Silverlight Control as a web resource. Once this is done, click on Save and Close. The dashboard will automatically refresh and should display the Bing Map which is maximised to use all available space.
Remember that we are ignoring the actual creation of the Silverlight Web Resource and are focusing on how easy it is to add the map into CRM without requiring any development knowledge. Dynamics CRM 4.0 required knowledge of XML to customize the Site Map, but we have managed to achieve the same integration just by using the available tools in the dashboard user interface.
Stay tuned for future posts where I will go into more detail of the actual creation of the Silverlight Map Control and how we can improve its functionality to display locations of CRM Accounts.
Category List

Filter by Author
Adam Murchison
Alfwyn Jordan
Arthur Mandisodza
Calum Jacobs
Colin Maitland
David Mochrie
Dominic Liu
Gayan Perera
Harshani Perera
Isaac Stephens
Jaime Smith
Jared Johnson
John Barrencechea
John Eccles
Lauren Withers
Paul Nieuwelaar
Roshan Mehta
Roz Millar
Ryan Blaikie
Ryan Ingram
Sarah Coleman
Sean Roque
Shalane Williams