

Extending Quick Find Functionality Using Advanced Find
Roshan Mehta, 23 July 2010
The Quick Find functionality of Microsoft Dynamics CRM 4.0 is a great tool to easily search for active records from within the entity’s grid view. The Quick Find view can be customized out-of-the-box to allow you to configure sorting, add view columns, or add find columns. However, sometimes it is desirable to have the freedom to search for all records of an entity type – that is, active and inactive records.
There is an unsupported customization that allows you to dig deep into the inner workings of CRM and modify the quick find view XML structure. Unfortunately, it seems that the customization isn’t available on all rollups for the product. Luckily, I have come up with a nice way to allow users to search for both active and inactive records using Advanced Find. You may be thinking - “I don’t have time to set up an Advanced Find query every time I want to search for inactive records”. With this method, you don’t need to go through the process of specifying the filter criteria in the Advanced Find tool every time you want to run it. All it takes is the initial set up of the advanced find view along with a few customizations. The actual use of the tool only requires a few clicks!
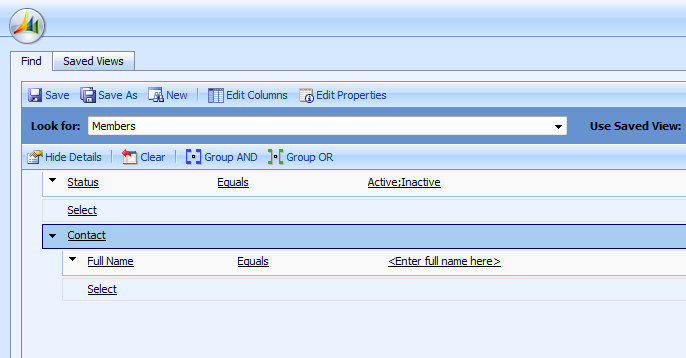
Firstly, we need to set up an Advanced Find query that we can save and share with other users in the organization. The example I am using here is for a Member entity, which has a lookup to the Contact entity. We want to look for all active and inactive Members, and search by the full name as it appears on the Contact record. Here is how I have set it up. Note that I have entered the text “<Enter full name here>”. This is because CRM won’t allow you to save the advanced find query if you haven’t entered a value for full name.
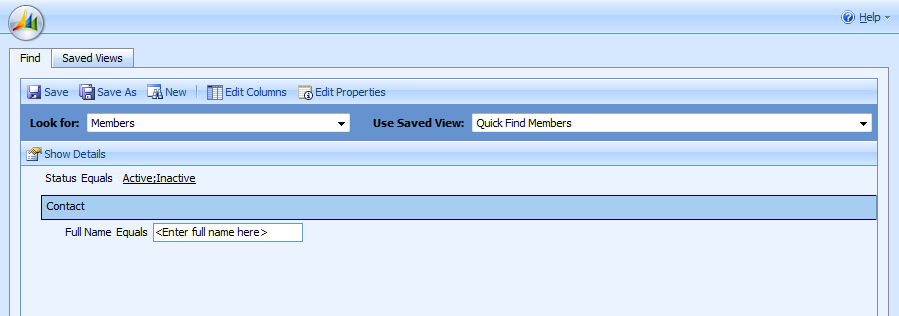
Click on Find to make sure that the query is behaving as desired. Next, click on Save As and give the Advanced Find query a meaningful name.
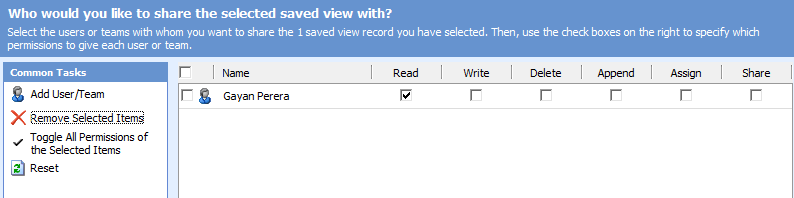
Next, we need to share this view with all users who will need to use the custom search feature. Select the saved view, click on More Actions and select Sharing. Select the users or teams we want to share with. We only need to allow read access to the view since we don’t want any other user to modify the search criteria.
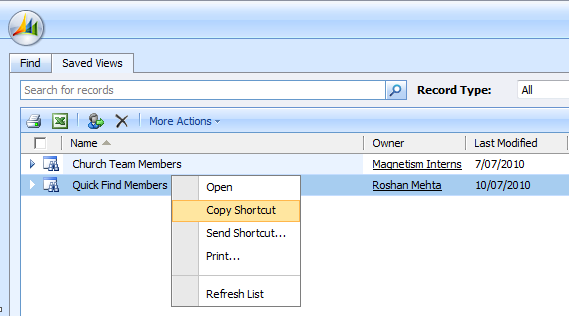
The next step is to find out the URL of our saved query. Click on the Saved Views tab, right-click on the view we have just saved, and click on Copy Shortcut.
The shortcut URL should look something like this: http://localhost:5555/MyOrg/advancedfind/advfind.aspx?etn=mag_member&;QueryId=%7b837AD92B-FC8B-DF11-922D-000000000000%7d&;ViewType=4230&;AutoRun=True
This is the URL that we will be inserting into our ISV config file. However, CRM will complain about the ampersands, so these needs to be replaced with &. Also, make sure you change AutoRun=True to AutoRun=False. This means that the advanced find query won’t automatically run, and will allow you to enter the full name into the search criteria.
Navigate to the Customizations area and click on Export Customizations. Click on ISV Config and then click on Export Selected Customizations. Open up the customizations.xml file in a text editor and add the following under the <Entities> node.
<Grid>
<MenuBar>
<Buttons>
<Button Icon=”mysearchicon.gif" Url="http://localhost:5555/MyOrg/advancedfind/advfind.aspx?etn=mag_member&;QueryId=%7b837AD92B-FC8B-DF11-922D-000000000000%7d&;ViewType=4230&;AutoRun=True" WinParams="dialogHeight: 630px; dialogWidth: 900px" WinMode="1">
<Titles>
<Title LCID="1033" Text="Quick Find All Members" />
</Titles>
<ToolTips>
<ToolTip LCID="1033" Text="Quick Find All Members" />
</ToolTips>
</Button>
<ToolBarSpacer />
</Buttons>
</MenuBar>
</Grid>
Save and import the customization file back into CRM and hit F5 to allow the customizations to take place. Navigate to the entity and click on the custom button we have added to the entity grid view.

Specify the name of the Member you are searching for and click Find. Now you can search for both active and inactive records for a single entity in just a few clicks. Happy searching!
Category List

Filter by Author
Adam Murchison
Alfwyn Jordan
Arthur Mandisodza
Calum Jacobs
Colin Maitland
David Mochrie
Dominic Liu
Gayan Perera
Harshani Perera
Isaac Stephens
Jaime Smith
Jared Johnson
John Barrencechea
John Eccles
Lauren Withers
Paul Nieuwelaar
Roshan Mehta
Roz Millar
Ryan Blaikie
Ryan Ingram
Sarah Coleman
Sean Roque
Shalane Williams