

Creating Services and Selection Rules Dynamics CRM 2011
Paul Nieuwelaar, 23 January 2012
In my last post, I introduced service scheduling, and what it is capable of in Dynamics CRM 2011. One of the things that were mentioned was the ability to create Services (such as ‘Wheel Change’), which contains certain Selection Rules (such as 1 Technician, and 1 Work Bay from the same site). In this blog post I will be demonstrating how to create a Service, and how to configure the Selection Rules required when performing this service. In the image below, we can see the Required Resources configured to perform this Service.

To create a new Service, you can navigate to Settings, Business Management, and then Services. Click on New, to open the new Service form. Enter the Name of the Service, and the Initial Status Reason, which will determine what the statuses of Service Activities are set to when they are scheduled. For a Wheel Change for example, this might be ‘Reserved’.
Next you need to specify the Default Duration for this Service, in other words: typically how long should it take to do this task. You can also specify the time between tasks using the ‘Start Activities Every’ field. If it will take 15 minutes to prepare for the service, then the scheduling engine will make sure the tasks have at least 15 minutes between them.

If we then scroll to the bottom of the Service, into the ‘Required Resources’ tab, we can specify the selection criteria for resources required to perform the service. To edit the first selection rule, double click the top row:

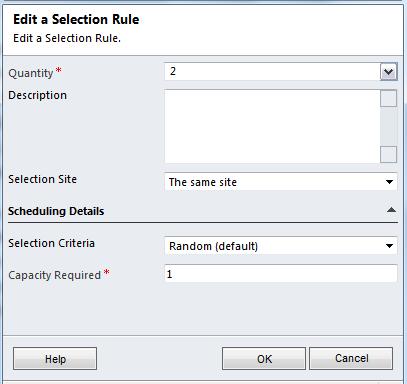
This will allow you to specify the Quantity (total number of resources to select) and the Selection Site (from the same site/location, or from any site). If you then expand the arrow to the right of the Scheduling Details heading, you can specify the Selection Criteria for resources (randomly selected, least busy selected, or most busy selected). Using the Least Busy selection criteria is a good way to make sure everyone has the same workload, where Most Busy can also be useful to make sure each worker is at full capacity before assigning work to anyone else.
You can also specify the Capacity required by the resource to perform this service. If for example the workshop has 4 work bays, the capacity of the workshop would be 4. That means the workshop can have 4 different jobs scheduled for the same time. You can then have different technicians, where the more skilled technicians can complete 2 tasks at once, so their capacity can be set to 2, and then they can have 2 jobs scheduled for the same time.
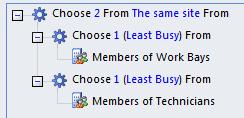
Once you’ve configured your initial selection rule, you can add resources into the rule, or create child selection rules. Using another 2 selection rules we can specify that we need 1 work bay, and 1 technician.

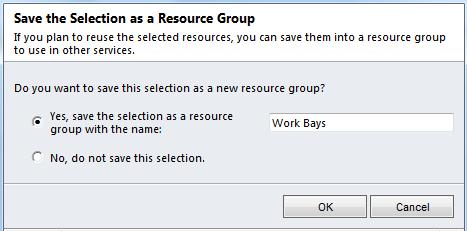
With your selection rules now in place, you can add in the applicable resources to each selection rule. Assuming the first selection rule will be for the Work Bays, we can click on add Resources, or select the rule and add them using the Common Tasks to the left. If you don’t already have Resource Groups set up, you can simply add the resources manually (Resource Groups are used to group together a bunch of resources, such as all the technicians). For the Work Bays rule, we can add all our Workshop Facilities. If you select 2 or more resources at once, you will be prompted to create Resource Group, which we can call Work Bays.
You can then add the technicians as users to the second selection rule, and when prompted create a resource group called Technicians. You should now be able to see your selection criteria coming together. You can also add other resources or selection rules in depending on your requirements.
Once you are satisfied with your Service and Selection Rules, you can save and close the Service, and begin scheduling service activities using your new service. Keep in mind that the more complex your selection rules, the less likely it is to find an available time slot. Also remember that if the selection rule says ‘Choose 2’, you must have 2 resources selected on the service activity. Not 1, and not 3.
If you ever need to modify or add new resources into your Resource Groups, you can manage these under Settings, Business Management, and Resource Groups.
In my next blog post I will be going through the full process of scheduling a service activity using the service and selection rules created here.
Category List

Filter by Author
Adam Murchison
Alfwyn Jordan
Arthur Mandisodza
Calum Jacobs
Colin Maitland
David Mochrie
Dominic Liu
Gayan Perera
Harshani Perera
Isaac Stephens
Jaime Smith
Jared Johnson
John Barrencechea
John Eccles
Lauren Withers
Paul Nieuwelaar
Roshan Mehta
Roz Millar
Ryan Blaikie
Ryan Ingram
Sarah Coleman
Sean Roque
Shalane Williams