

How to use Dialogs in Dynamics CRM 2011
Paul Nieuwelaar, 29 December 2010
In Dynamics CRM 2011, as well as having the ability to create workflows, like in Dynamics CRM 4.0, you can also create Dialogs. Dialogs are like workflows, although they allow you to work through them step by step, with user interaction, including prompts to gather information easier.
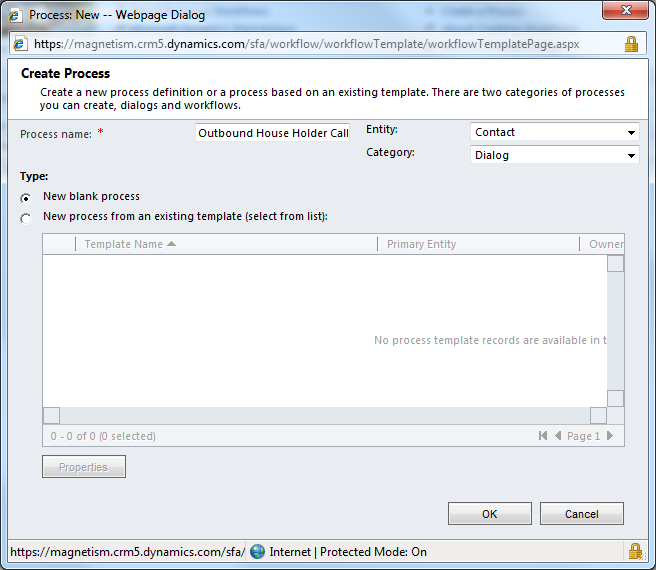
To create a Dialog go to Settings, and select Processes. Click New to create a new Process.
Give it a descriptive name, then select Dialog from the Category menu, and set the Entity the Dialog will run on. Then click Ok.
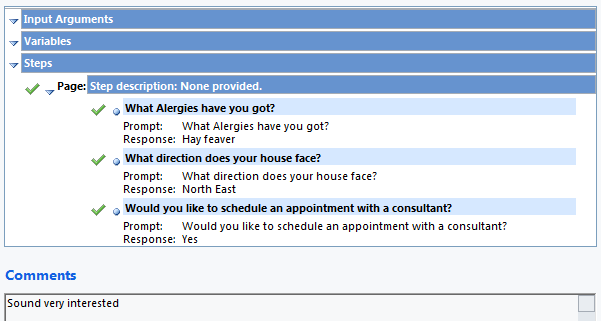
The Dialog window will now open, and you can start adding steps. For this example I will be creating a Dialog for a Call Centre Agent performing an outgoing call for a home ventilation company.
1. To start creating the Dialog, click where it has ‘select this row’.
2. Click the Add Step menu.
3. From the options, select Page.
4. Under the page item, click ‘select this row’
5. Click Add Step, and select ‘Prompt and Response’.
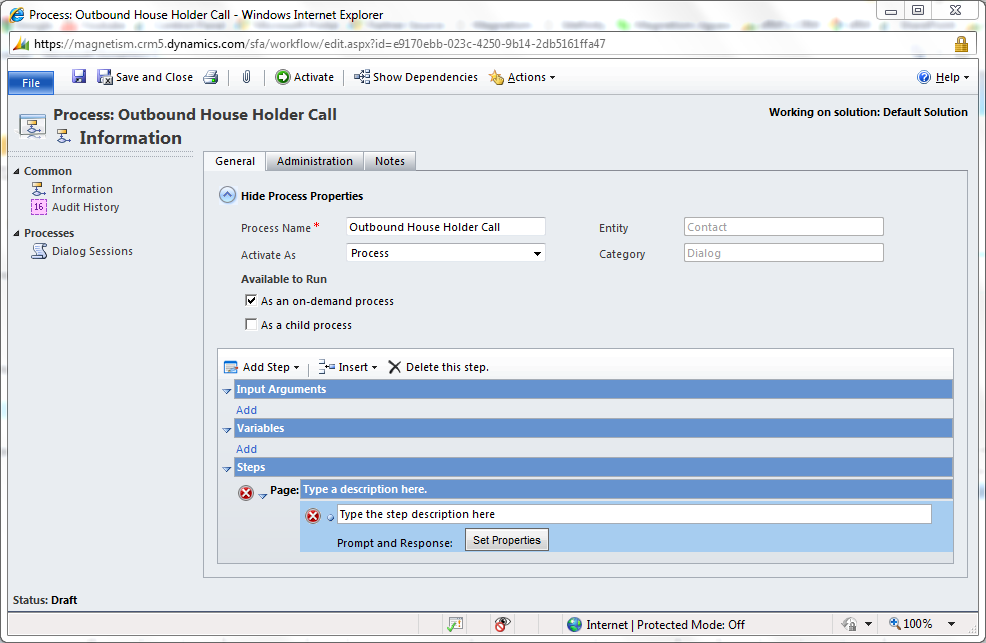
6. Click Set Properties on the Prompt and Response item.
7. Set a Statement Label and Prompt Text (I find it easiest to make these the same).
8. Set the Response Type, and any other fields you need.
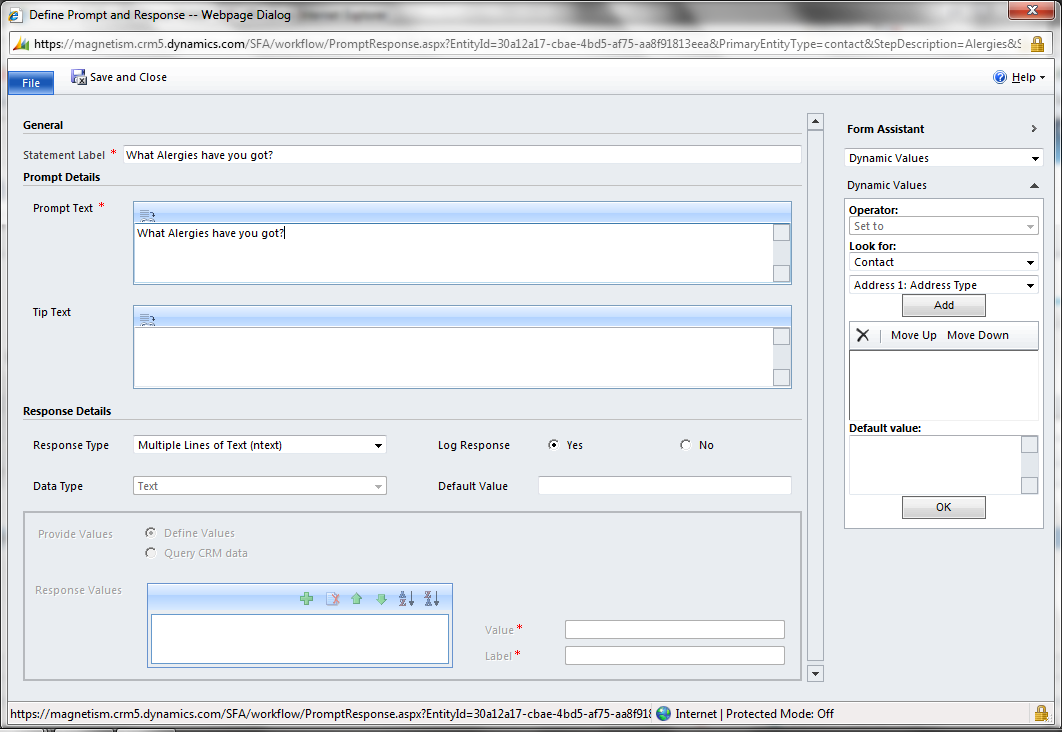
9. Save and Close the Prompt and Response, and then set other prompts if required.
10. For multiple pages, choose to add another Page from the Add Step menu.
11. You may want to set it to run as an ‘on-demand process’, so you can run it manually.
12. Finally click Activate.
Now you can open a Contact, select the ‘Start Dialog’ button from the ribbon, and then select the Dialog you created.
The Dialog window will open, and you can enter the data into the step by step fields.
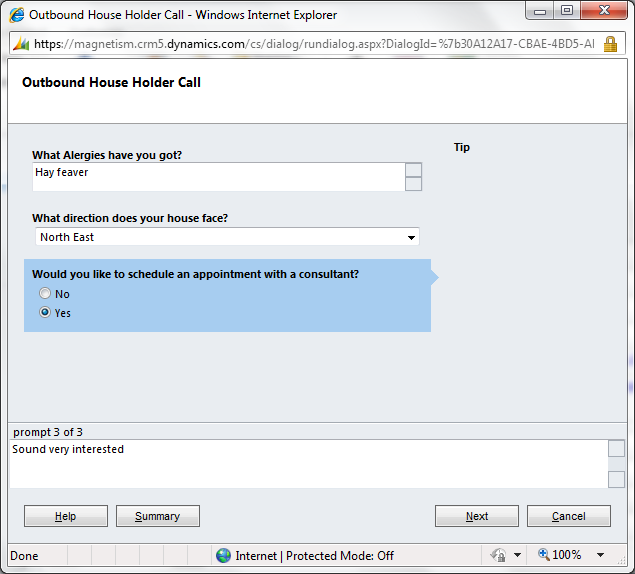
When you’re done you will be able to view the results of the Dialog under ‘Dialog Sessions’ on the Contact, or by going to ‘Dialog Sessions’ on the Dialog Process itself.
Category List

Filter by Author
Adam Murchison
Alfwyn Jordan
Arthur Mandisodza
Calum Jacobs
Colin Maitland
David Mochrie
Dominic Liu
Gayan Perera
Harshani Perera
Isaac Stephens
Jaime Smith
Jared Johnson
John Barrencechea
John Eccles
Lauren Withers
Paul Nieuwelaar
Roshan Mehta
Roz Millar
Ryan Blaikie
Ryan Ingram
Sarah Coleman
Sean Roque
Shalane Williams