CRM 2013: JavaScript – Lookup Filtering using addCustomFilter
Nathan Eccles, 30 September 2013
CRM 2013 brings with it a number of new supported javascript methods, including the ability to better apply custom filtering to lookups. In CRM 2011 if we needed custom filtering, we would have to go about the somewhat cumbersome process of creating a custom view in code and then adding it to the control using “.addCustomView”.
While this served its purpose well, Microsoft has given us the exciting new feature of being able to simply apply a custom filter to a lookup itself, meaning ALL views available in the lookup are filtered. In addition to this, we have also been given the ability to apply this filter immediately as the lookup is clicked, rather than on load or on change of the related fields.
Below I will show you how to filter a lookup based on the value of another field on the form. In this scenario we will be using the Email field to filter the Parent Account lookup to only display Accounts with a matching Email address, and to display all Accounts when no email address is specified.
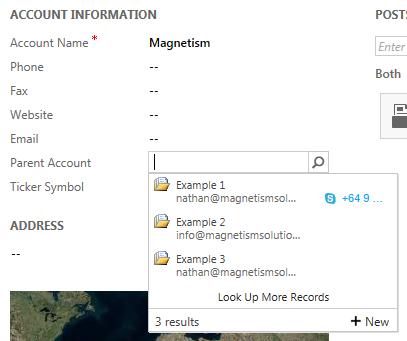
Below is how the lookup looks before it is filtered:

To filter this we use the following code, and call the “preFilterLookup” function on load of the form:
function preFilterLookup() { Xrm.Page.getControl("parentaccountid").addPreSearch(function () {
addLookupFilter();
}
function addLookupFilter() {
var email = Xrm.Page.getAttribute("emailaddress1").getValue();
if (email != null) {
fetchXml = "<filter type='and'><condition attribute='emailaddress1' operator='eq' value='" + email + "' /></filter>"; Xrm.Page.getControl("parentaccountid").addCustomFilter(fetchXml);
}
}
Please be aware that in order to use the “.addCustomFilter” it must be used in conjunction with the “.preFilterSearch”, and the fetchXml filter must contain the <filter> tags around the <condition />.
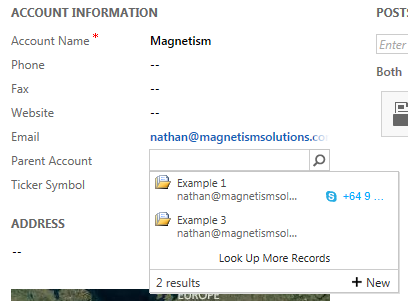
Having applied this filter and entered in a value into the Email field we can see the filter is being applied.

The filter is applied to all available views in the lookup, so there’s no more worrying about ensuring your custom view is the only one visible!

