

Hiding Fields Based on User Selection
Nathan Eccles, 21 May 2010
Recently I came across the problem of one entity needing the choice between two look-up fields; Product and Custom Product. Now I could have just left both the fields there and let the user work out which one to use, but because I believe in ease of use I decided to look into some client-side scripting (JScript).
The first step to take was to create the two relationships (lookups), and an additional bit field called “Type”.
- Navigate to Settings, Customization, Customize Entities.
- Open the entity you wish to edit.
- Create two N:1 Relationships, one to each of the entities you wish to link to.
- Create a new Attribute with the type of bit which will indicate to users which lookup field they require.
Note: Renaming “Yes” and “No” will make it easier for your users to identify the type of record they wish to look up. For example I used “Product” and “Custom Product”. - Publish the entity.
- Click on Forms and Views and open the Form view.
- Add the three attributes you have just created onto the form (I would suggest formatting as shown below).
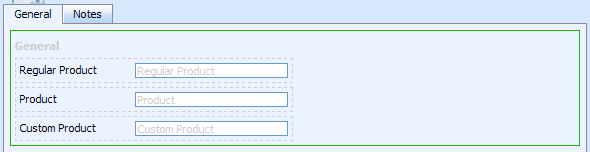
Now we need to make only the appropriate field appear based on the bit selection.
- For each of the three attributes;
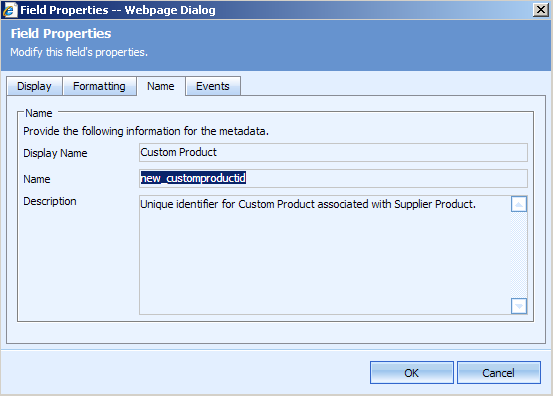
- Select the attribute and click Change Properties on the right.
- Go to the Name tab.
- Note down their Name (NOT Display Name).
- On the main form edit page click on Form Properties, ensure OnLoad is selected, then click Edit.
- Check the box Event in enabled. and copy in the following code:
if (crmForm.all.defining_value.DataValue == true) {
crmForm.all.lookup1_c.style.display = "inline";
crmForm.all.lookup1_d.style.display = "inline";
crmForm.all.lookup2_c.style.display = "none";
crmForm.all.lookup2_d.style.display = "none";
}
else {
crmForm.all.lookup1_c.style.display = "none";
crmForm.all.lookup1_d.style.display = "none";
crmForm.all.lookup2_c.style.display = "inline";
crmForm.all.lookup2_d.style.display = "inline";
} - Replace defining_value with the name of the bit attribute, lookup1 with the name of the first lookup field on the form, and lookup2 with the name of the second lookup field on the form.
Note: The “_c” is defining the display name of the attribute while “_d” is defining the attribute field. - Copy the code you just entered.
- Click OK twice.
- Select the bit attribute and click Change Properties.
- Click the Events tab and then Edit.
- Check the box Event is enabled. and paste the code you copied in step 5.
- Click OK twice.
- Preview your form and make sure the code is working as expected.
Note: If you have not published the entity since creating the bit attribute, it will not display properly. - Save and Close the form.
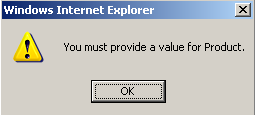
My problem after I had that working was that whichever field was displayed needed to be a required field. If I just set them both as required fields then I will never be able to save a record as I will always get an error message telling me I need to fill in all required fields (the hidden one).
To get around this I added a little more JScript code which makes the hidden field read-only. This works because required fields which are read-only do not require an entry, and therefore do not display the error message.
Note: The below steps are only needed if the fields you wish to hide are Required Fields.
- Click N:1 Relationships and open the relationships you created earlier.
- In the Relationship Attribute area change the Requirement Level to “Business Required”.
- Save and Close the relationships.
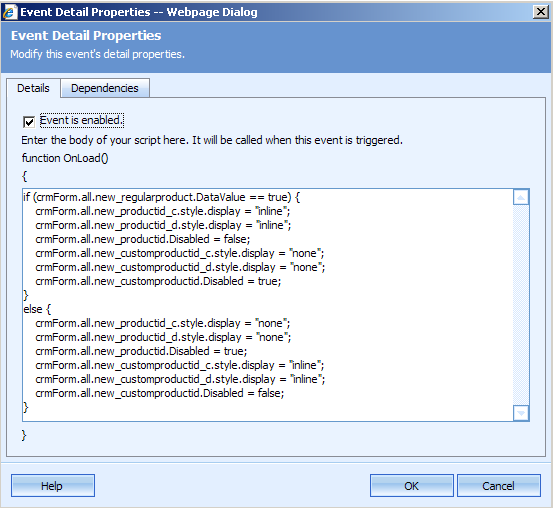
- Open the OnLoad event for the entity and replace the previous code with the following code:
if (crmForm.all.defining_value.DataValue == true) {
crmForm.all.lookup1_c.style.display = "inline";
crmForm.all.lookup1_d.style.display = "inline";
crmForm.all.lookup1.Disabled = false;
crmForm.all.lookup2_c.style.display = "none";
crmForm.all.lookup2_d.style.display = "none";
crmForm.all.lookup2.Disabled = true;
}
else {
crmForm.all.lookup1_c.style.display = "none";
crmForm.all.lookup1_d.style.display = "none";
crmForm.all.lookup1.Disabled = true;
crmForm.all.lookup2_c.style.display = "inline";
crmForm.all.lookup2_d.style.display = "inline";
crmForm.all.lookup2.Disabled = false;
} - Replace defining_value with the name of the bit attribute, lookup1 with the name of the first lookup field on the form, and lookup2 with the name of the second lookup field on the form.
 Copy the code into the OnChange event of the bit attribute, replacing the previous code.
 - Preview the form to ensure everything looks correct.
- Save and Close the form.
- Publish the entity.
- Create one of each type of lookup to ensure you are not getting an error message about the hidden field.
Remember to always check usability of the system when editing this code as any mistakes could stop you from being able to edit the entity.
Enjoy!
Category List

Filter by Author
Adam Murchison
Alfwyn Jordan
Arthur Mandisodza
Calum Jacobs
Colin Maitland
David Mochrie
Dominic Liu
Gayan Perera
Harshani Perera
Isaac Stephens
Jaime Smith
Jared Johnson
John Barrencechea
John Eccles
Lauren Withers
Paul Nieuwelaar
Roshan Mehta
Roz Millar
Ryan Blaikie
Ryan Ingram
Sarah Coleman
Sean Roque
Shalane Williams