

Pre-Populating Fields in Microsoft Dynamics CRM 4.0
Nathan Eccles, 30 April 2010
Ever noticed a field you always fill out with the same information every time you create a new record? Ever wondered why you can’t just have that field pre-populate with the required text?
There is actually a way to do this using a little trick we like to call ‘Client-Side Scripting’. The name might sound complicated, but hopefully after reading this post you’ll be able to pre-populate all the fields you want!
Throughout this section of the blog the images will relate to the application of this process to pre-populate the Country/Region field with text “New Zealand”.
- Navigate to Settings, Customization, and then Customize Entities.
- Open the entity for which you wish to have a field pre-populated.
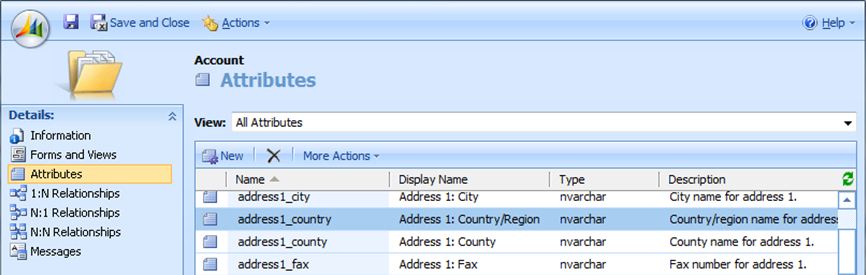
- Select Attributes and locate the field which you wish to pre-populate by looking at the Display Name. When you have found the attribute, note down its Name.
- Select Forms and Views and open the Form view.
- In the right task-bar open Form Properties.
- From the Event List click OnLoad and then Edit.
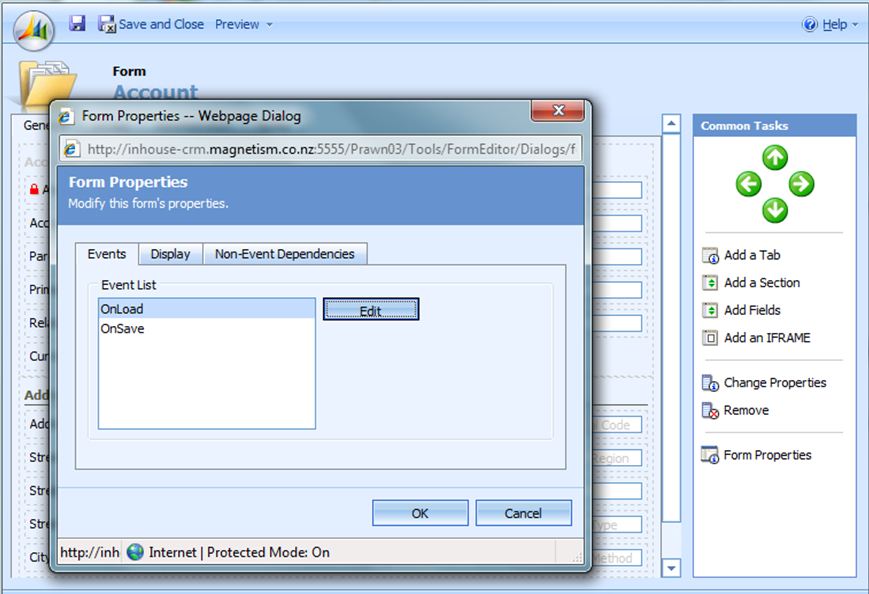
- Check the box Event is enabled and copy in the following code:
if (crmForm.all.<attribute_name>.DataValue == null){
crmForm.all.<attribute_name>.DataValue = "<desired text here>";
}
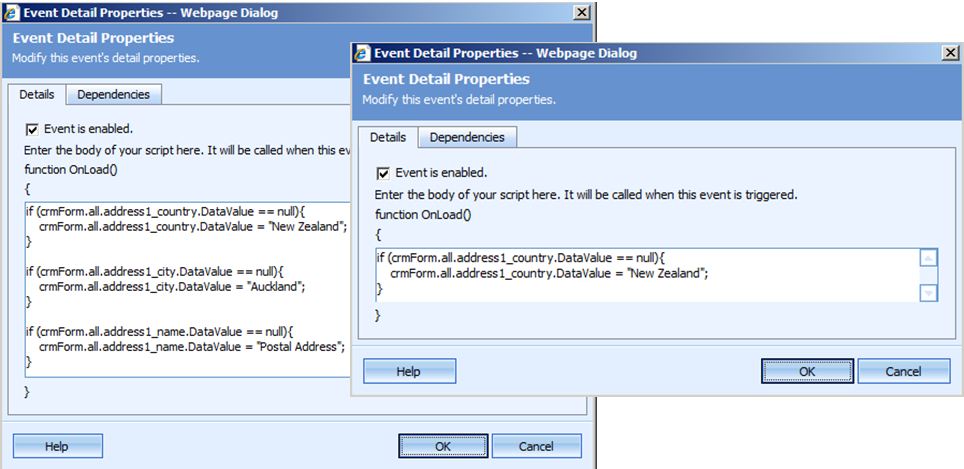
(To pre-populate multiple fields simply copy the code multiple times.) - Replace the <attribute_name> with the name of the attribute identified in step 3, and <desired text here> with your desired display text.
- Click OK twice then on the top task bar select Preview and then Create Form.
- Ensure the field is being pre-populated correctly and close the preview form.
- Click Save and Close twice and then Publish the entity.
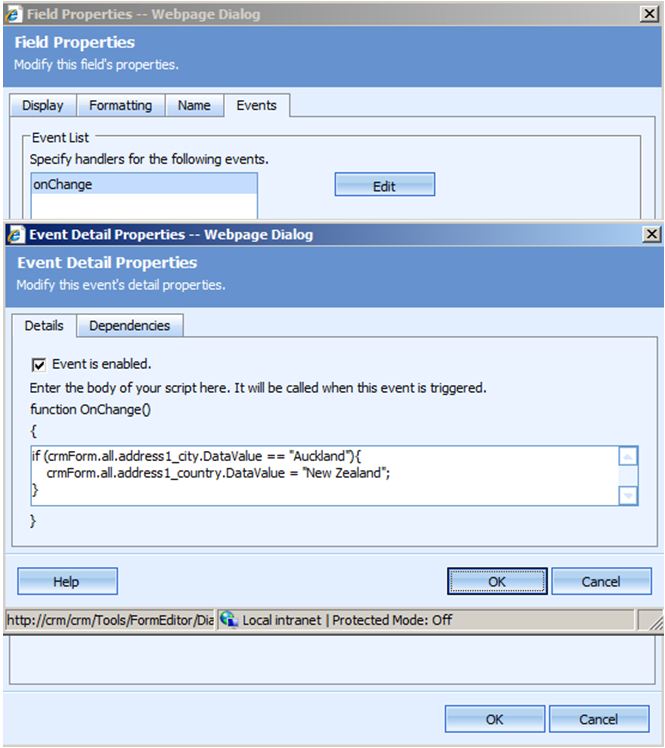
Here is a worked example of what the code is defining:

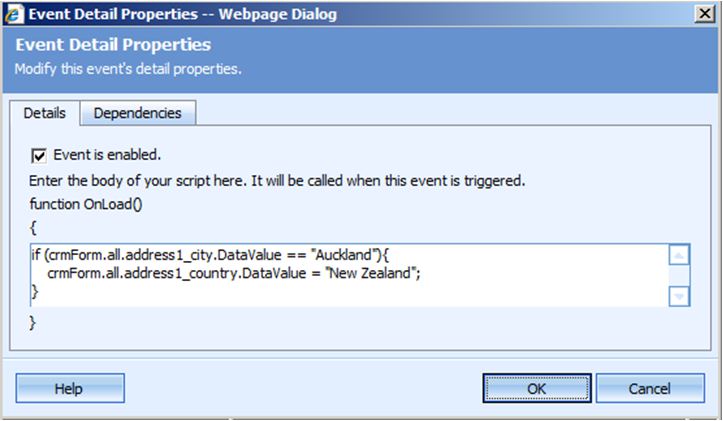
Using a similar method we are able to pre-populate a different text field based on the value of another.
In this instance I will demonstrate this by populating the Country/Region attribute based on the City attribute.
- Follow the above steps finding both the name of the attribute you wish to populate, as well as the name of the attribute that defines that population.
- Copy the following code into the OnLoad event:
if (crmForm.all.<attribute_name1>.DataValue == "<text to check>"){
crmForm.all.<attribute_name2>.DataValue = "<desired text here>";
} - Change <attribute1_name> to the name of the defining attribute and <attribute2_name> to the name of the attribute you wish to populate. Change <text to check> to the text that you wish to check is in place and <desired text here> to the text you wish to populate in the related field.
To make this work most effectively, copy and paste the code you have just entered into the OnChange event of the defining field. - To do this, return to the Form Customization window and double click on the defining attribute.
- Select the tab Events and then click Edit.
- Paste in the code you entered into the OnLoad event.
- Ensure that the Event is enabled Checkbox is checked.
- Once the code is in both the OnLoad event of the form, and OnChange event of the defining attribute, preview and test your customizations, save the entity, and publish it.
Category List

Filter by Author
Adam Murchison
Alfwyn Jordan
Arthur Mandisodza
Calum Jacobs
Colin Maitland
David Mochrie
Dominic Liu
Gayan Perera
Harshani Perera
Isaac Stephens
Jaime Smith
Jared Johnson
John Barrencechea
John Eccles
Lauren Withers
Paul Nieuwelaar
Roshan Mehta
Roz Millar
Ryan Blaikie
Ryan Ingram
Sarah Coleman
Sean Roque
Shalane Williams