

Add, Edit, Disable Users in Dynamics CRM 2011
Megha Kainth, 11 February 2012
Dynamics CRM 2011 gives us the ability to add a new user, edit user information and deactivate user records. Here, I will explain how to add, edit and disable users in Dynamics CRM 2011.
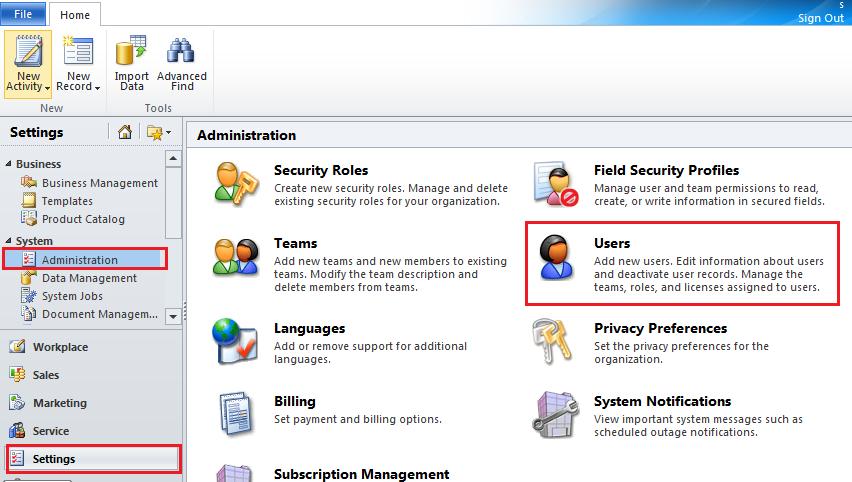
To add users, Click on Settings > Administration > Users.
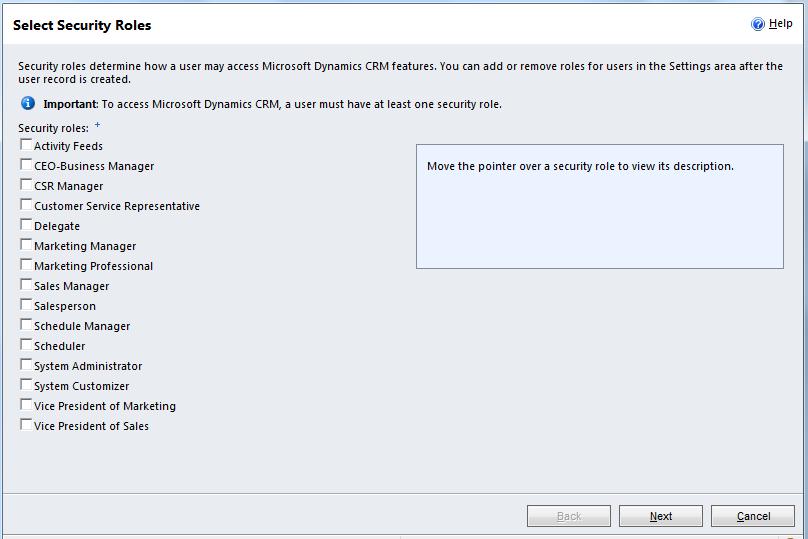
Click on New and Select appropriate Security roles for the User. Security roles determine how a user may access Microsoft Dynamics CRM features. You can add or remove roles for users after the user record is created. You must give at least one security role to a user.
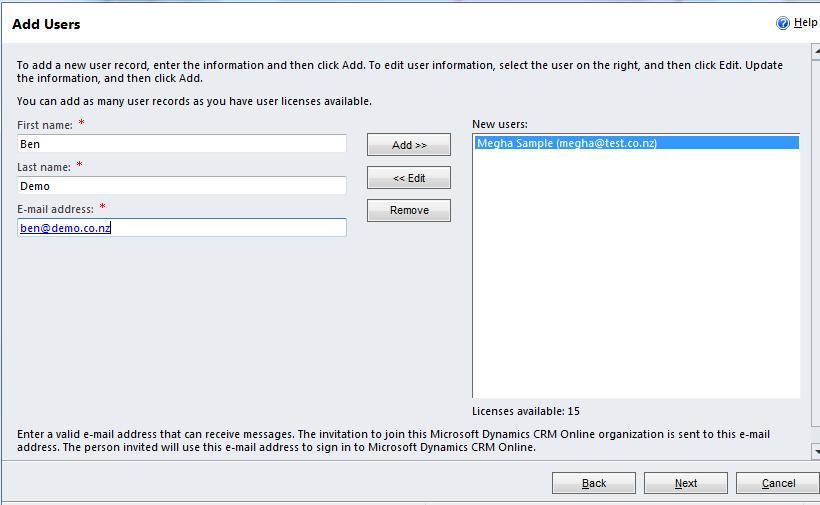
To add a new user record, enter First name, Last name and a valid e-mail address and click Add. If you want to edit the user information, select the user on the right, and click on Edit, update the information and Click on Add. Click on Next once you are done.
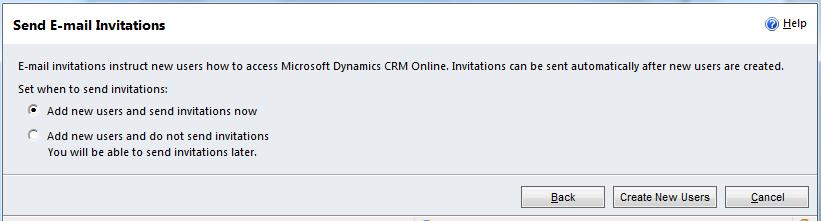
Now you can send e-mail invitations to your new users to access Dynamics CRM. You can choose to send the invitations now or later.
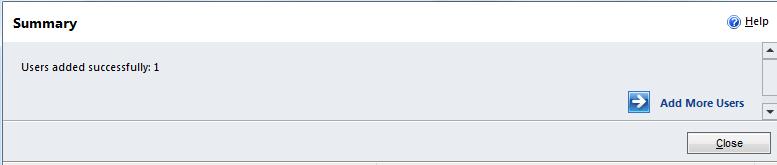
Click on Create New Users. It will process your request and add new users.
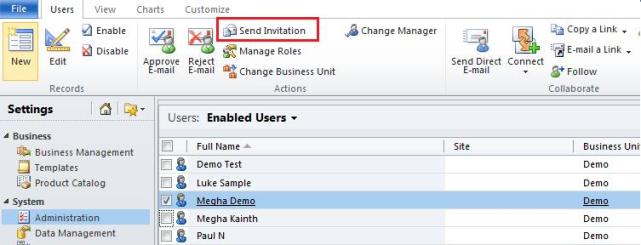
If you have selected do not send invitations in the Send E-mail Invitations window. You can go back to Enabled Users screen. Select a User and Click on Send Invitation.
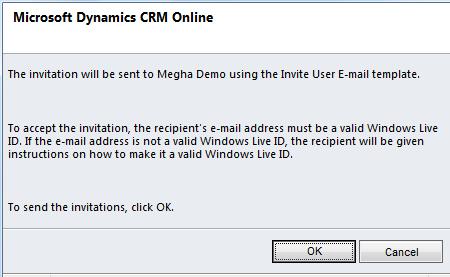
A window will pop up click on OK.
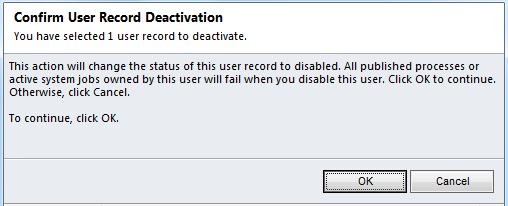
If a user record is not required any more you can simply disable it. Select the specific user record and Click on Disable.
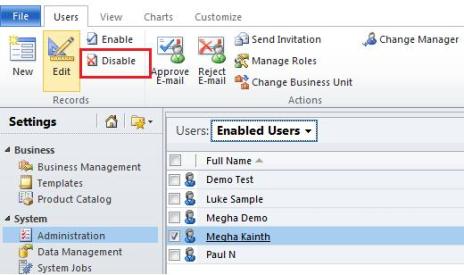
A window will pop up to confirm the user record deactivation. Click on OK and It will disable the user.
If you would like to manage the security role of your users, you can simply select the user and Click on Manage Roles.
Select the appropriate User Roles and Click OK.
I hope you will find this blog post helpful in adding, editing and deactivating user records.
Category List

Filter by Author
Adam Murchison
Alfwyn Jordan
Arthur Mandisodza
Calum Jacobs
Colin Maitland
David Mochrie
Dominic Liu
Gayan Perera
Harshani Perera
Isaac Stephens
Jaime Smith
Jared Johnson
John Barrencechea
John Eccles
Lauren Withers
Paul Nieuwelaar
Roshan Mehta
Roz Millar
Ryan Blaikie
Ryan Ingram
Sarah Coleman
Sean Roque
Shalane Williams