

VS Team Explorer for Excel and Using Publish Refresh Button
Manjula Chetty, 10 July 2014
One of the great challenges we all face is exporting test cases, list of bugs etc. from TFS to Excel so we can track information in form of charts and which can be used for reporting purposes on a day to day basis. In this post we will learn about how the test cases, bugs etc. can be imported into excel from TFS, changes which are made in excel will be reflected in TFS and vice versa, so we don’t have to update them twice once in TFS and again in excel separately.
VS Team Explorer for Excel
1. To import test cases in Excel you need Team Explorer installed to get the Team Foundation add in to Excel. You can install Team Explorer from here. After installing the software just restart your excel application and you are all set to go with a new command bar option called “TEAM”.

2. Click on New List button to connect to TFS server and start importing Test Cases, Bugs from TFS.
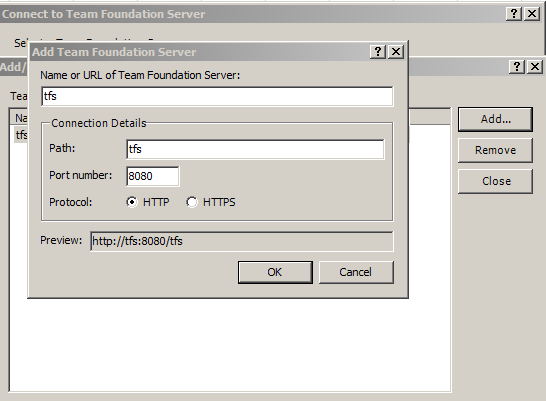
3. Connect to the TFS server by connecting to your Team Foundation Server and Click on Connect in Connect to Team Foundation Server popup.
4. All the Projects which you are a member of will be displayed.
5. Choose the project which you need to import from.
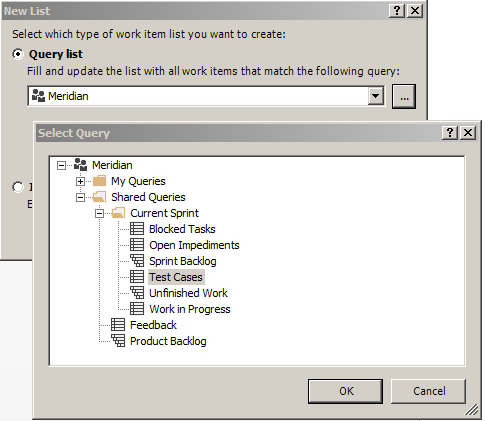
6. Select the item which you need to import for example test cases or bugs and click on OK.
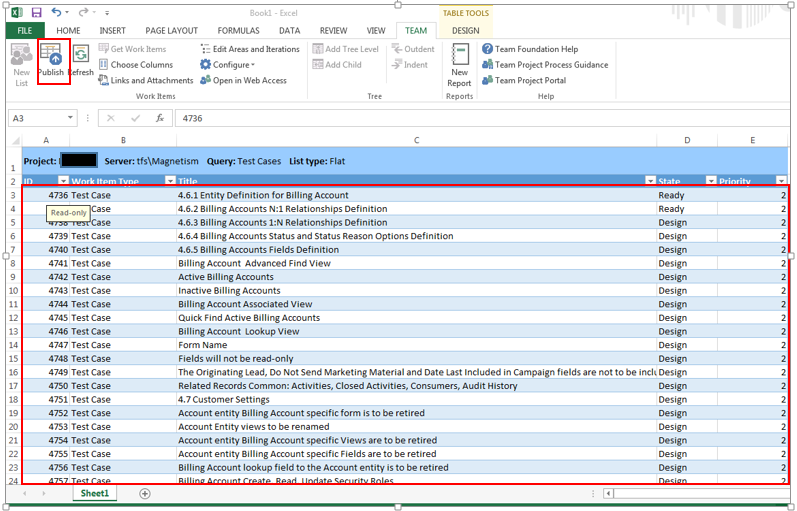
7. The selected items should be imported into your excel sheet.
Using Publish button and Refresh Button
The changes done to the imported list will be reflected in TFS when used the Publish Button on the fields prior to editing. Same way all the changes done to the items in TFS which have been imported in Excel will be reflected in Excel when clicked on Refresh Button.
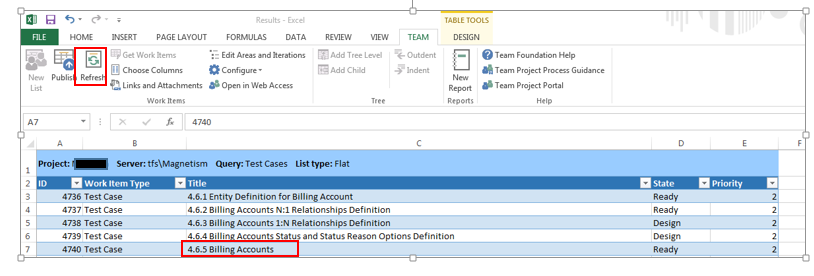
1. Select one or all the cells in the excel sheet and click on publish button.
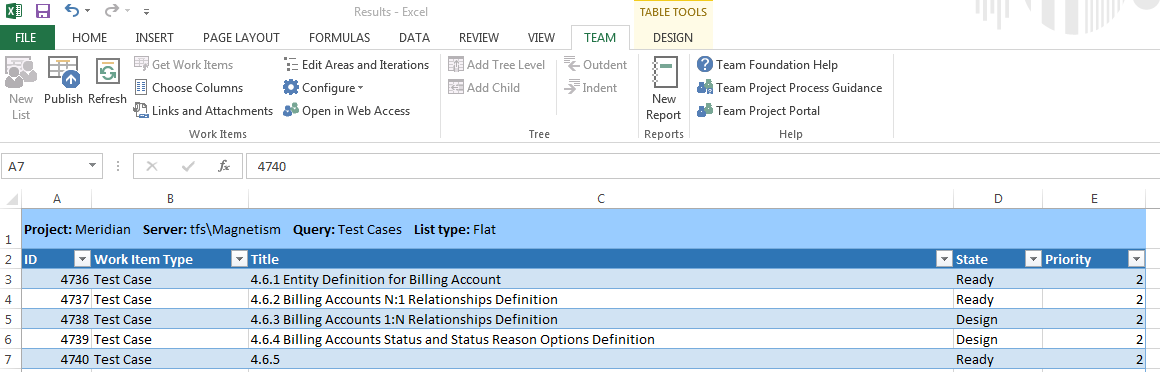
2. If you edit any of the fields which have been published then the changes will be reflected in TFS. For example I will edit Test Case 4740 to display title as “4.6.5” and change the State to “Ready”
3. Select the cell with ID 4740 and click on Open in Web Access as shown in above screenshot, TFS should open in a browser and display the selected Test case with the changes made in the Excel Sheet.
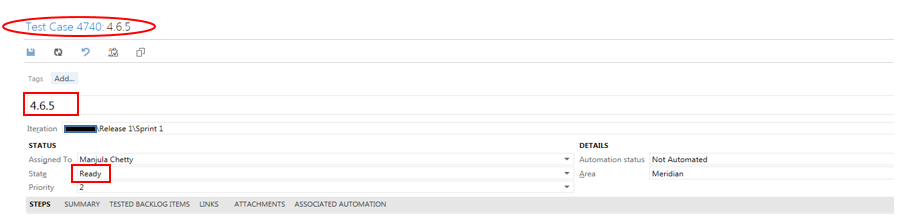
4. In TFS Edit the Test Case title to “4.6.5 Billing Accounts” and click on save.
5. Go to the imported excel sheet and click on refresh button. The title should be updated to 4.6.5 Billing Accounts.
That’s how it makes our life much simpler by not having to update the items twice once in TFS and again in EXCEL. Once we have all the data in excel then we can start generating reports and charts which will be much easier to publish and also easier for people to read and understand.
Category List

Filter by Author
Adam Murchison
Alfwyn Jordan
Arthur Mandisodza
Calum Jacobs
Colin Maitland
David Mochrie
Dominic Liu
Gayan Perera
Harshani Perera
Isaac Stephens
Jaime Smith
Jared Johnson
John Barrencechea
John Eccles
Lauren Withers
Paul Nieuwelaar
Roshan Mehta
Roz Millar
Ryan Blaikie
Ryan Ingram
Sarah Coleman
Sean Roque
Shalane Williams