

MS Communities – Managing a User Group Part 1
Jared Johnson, 24 February 2012
Each MS Communities user group has its own management page. On this page a group admin can do things such as change the group name and image, manage group members and forums.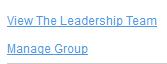
To access the management page you must be logged and be a group admin. When logged in a “Manage Group” link will appear on your group homepage underneath the “View the Leadership Team” link.
After navigating to this link there will be a page with 4 tabs, General, Members, Roles and Forums.
In the General tab there are 6 fields: Display name, this is the name the group is displayed as throughout the site. Description, this is the group description text that is displayed on the group homepage as well as a number of other places.
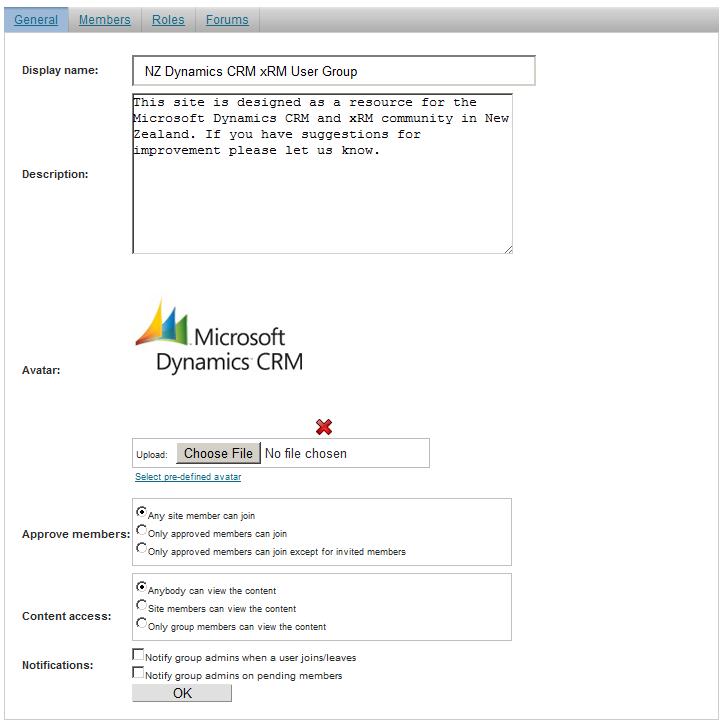
Avatar, this is your group logo, you can upload an image to use from your computer using the browse button or select an image that is already in the system by clicking the “Select pre-defined avatar” link. You can also delete the current avatar by clicking the red X, however note that you MUST have an avatar so make sure to select a new one if you do this (if you really do not want your group to have a logo you can just upload a transparent png or something similar).
Approve members, this has 3 options: “Any site member can join” means that if someone that already has an mscommunities.co.nz account applies to join your group they are automatically approved. “Only approved members can join” means that when people join the group they must wait to be approved or rejected by a group admin before being admitted, “Only approved members can join except for invited members” is the same except that members that have been invited to join the group by a group admin do not need to go through the approval process.
Content access, this can limit your group site to be only viewed by MS Communities site members or your group members, however it is best to leave it on the default “Anybody can view the content” option. Lastly Notifications, these check boxes will, when checked, email the group admins when a user joins or is pending, the “Notify group admins on pending members” checkbox should be checked if you are requiring members be approved before joining, so an admin will know to approve/reject them.
The next tab is the Members tab. This tab is where group admins can manage the members of their group. The first thing on this tab is a link “Invite to group”, this will send an email to an MS Communties site member or any email address inviting them to join the group. The next thing is a filter, you can filter members by username or by what status they have (such has waiting to be approved).
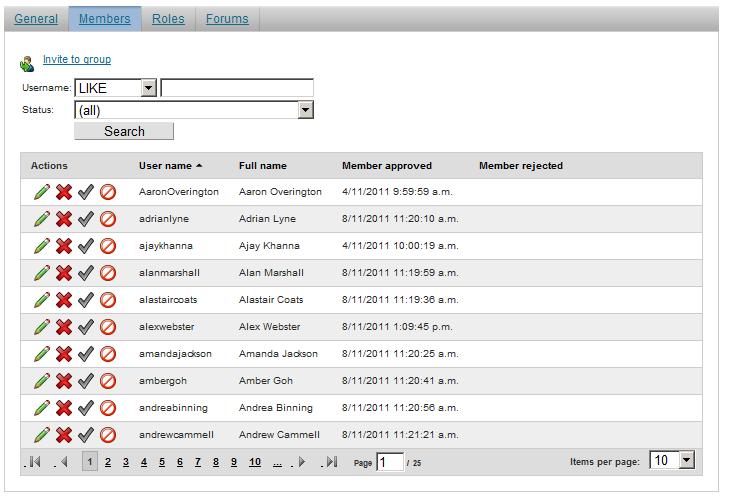
Then there is the list of members. Each member has 4 buttons next to them, these buttons are Edit (the green pencil), Delete (the red cross), approve (the tick) and reject (the red crossed through circle). The edit button opens up the member in its own window where you can edit the member’s roles and leave a comment for other admins.
The delete button will remove the member from the group entirely, and approve and reject buttons will either approve or reject members who are waiting to enter the group.
In part 2 of this blog I will explain the remaining 2 tabs – Roles and Forums.
Category List

Filter by Author
Adam Murchison
Alfwyn Jordan
Arthur Mandisodza
Calum Jacobs
Colin Maitland
David Mochrie
Dominic Liu
Gayan Perera
Harshani Perera
Isaac Stephens
Jaime Smith
Jared Johnson
John Barrencechea
John Eccles
Lauren Withers
Paul Nieuwelaar
Roshan Mehta
Roz Millar
Ryan Blaikie
Ryan Ingram
Sarah Coleman
Sean Roque
Shalane Williams