

MS Communities – Adding/Editing Group Events
Jared Johnson, 21 December 2011
The events feature of a user group allows you to create events for your users that they can register for. The events from the entire set of user groups are displayed on the main events page here on a calendar. Each user group however has their own events page that displays only their events; it can be accessed by clicking on the events link in the navigation bar when on that group’s homepage.
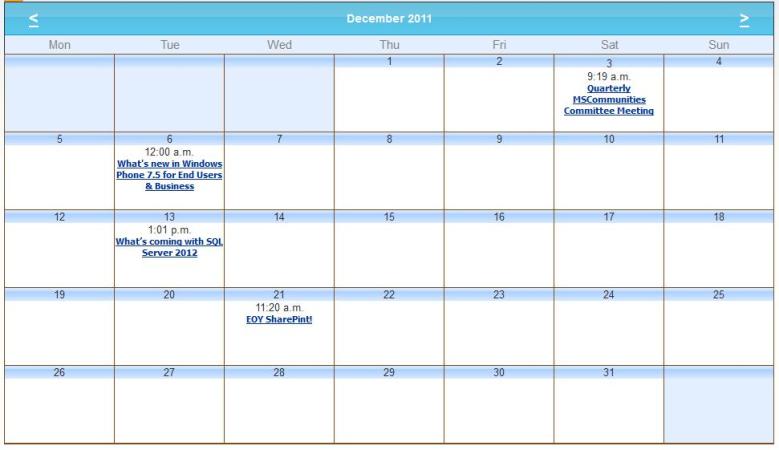
In order to add or edit events you must be a group admin, when you are logged in with admin rights you navigate to your groups event page the events editor will appear underneath the events calendar.

This editor shows all of the events like the main events page and not just the group events, Clicking the “Add new Event” link creates a new event, the green pencil and red cross edits the event and deletes the event respectively.
Clicking the Add new Event link or the green pencil button will open the event editor which looks like this:
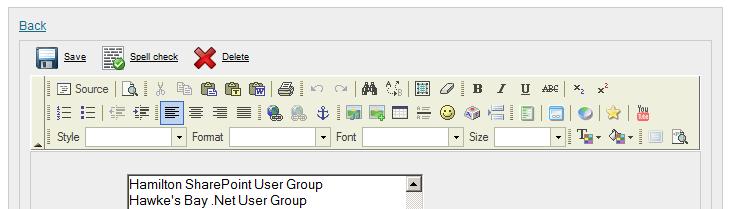
The Back link will take you back to the list of events, you can Save or delete the event you are editing with the Save and delete buttons and there are some word processor style buttons to help edit the content of the event.
The event is made up from a number of fields, these include: User Group, Technology, Region, Event name, Event date, Event summary, Event Location, Open from, Open to, Event details, Presenter, RSVP, Capacity, Attendance, Allow registration over capacity, Publish from and Publish to.
User Group and Technology are both drop down lists that let you pick which user group this event is for and what technology it is about, Region is where you can specify where the event is being held.
Event name is the title of the event and is how it will appear in the calendar, event date is the date and time that the event begins, and where it appears on the calendar will depend on this date.
Event summary, Event location and Event details can all be formatted using the Text controls at the top of the page, Event summary is a short summary of the event, this is what appears in the past and upcoming events on a group’s homepage. Keep this as short as possible
Event location is where you can specify the location of your event and any travel directions in order to get there, Event details is the main content of the event that is viewed when it is opened.
Open from and Open to control the registration of events, Open from is the date from which people can sign up for the event and Open to is when this closes.
Presenter and RSVP allow you to specify who the presenter(s) of the event are and the email/phone number of RSVP if it is required.
Capacity is how many users can sign up for your event before it closes, if Allow registration over capacity is checked users can still register for the event even if it is over capacity. The attendance field is where you can add how many users actually attended the event.
Publish from and Publish to both control the lifetime of the event, Publish from sets a date and time when the event appears, Setting a publish to date and time will cause the event item to disappear from the site when that date is reached. Both of these fields can be left blank if they are not required.
Once you are done editing the news item just click the Save button at the top of the page - if it is saved successfully a message “The changes were saved.” will appear if not you did not fill out one fields correctly and some red text should describe what field is the problem.
With this information you can get started on adding events for your group!
Category List
Filter by Author
Adam Murchison
Alfwyn Jordan
Arthur Mandisodza
Calum Jacobs
Colin Maitland
David Mochrie
Dominic Liu
Gayan Perera
Harshani Perera
Isaac Stephens
Jaime Smith
Jared Johnson
John Barrencechea
John Eccles
Lauren Withers
Paul Nieuwelaar
Roshan Mehta
Roz Millar
Ryan Blaikie
Ryan Ingram
Sarah Coleman
Sean Roque
Shalane Williams