Microsoft tag
David Sutton, 19 April 2010
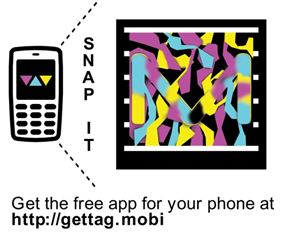
Microsoft Tag is a coloured barcode that can be used for redirecting customers to a website or adding contact details to their phone. One thing that can be done with the tags  is that images can be added to them and they can be personalised to your company or individual style. This is one that I have done previously for a link to the magnetism website. If you look closely I have included shadows around the M and the other random shapes to give it a 3d feel.
I use Adobe Photoshop to create the icons as it is a program that I find easy to use and is familiar but you can use any program that works for you. When getting your tag off Microsoft I suggest that you get the largest or a large size so that you can use it for more than one project – for a large image such as on a billboard and then later on you can shrink it and place it on a business card. This is all so you don’t have to keep going back to Microsoft for more. Just remember you can use any letter or image with these tags it is completely up to you as what you use.
 Once you have the tag you should import it into Photoshop or the program you are using. Because of the large size that Microsoft can supply the tag in I suggest that you shrink it from the full size which can be up to 120in, and this shrinking can be during the import into Photoshop. There is no right or wrong size you have to make the tag it is really on a case by case basis.
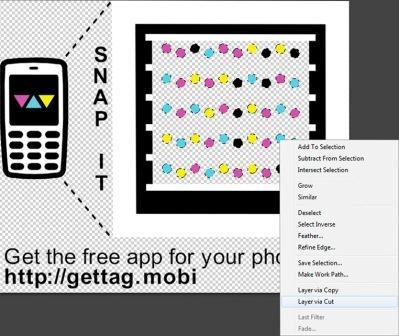
Once the image is in Photoshop the first thing I would say to do is separate the dots from the frame and put them on a layer above everything else. To separate them just select the dots with the magic wand tool and then right click inside one of the dots and then click on ‘Layer via Cut’ this with then cut the dots and paste the dots onto a new layer, be sure that the dots layer is on the layer above the main image.
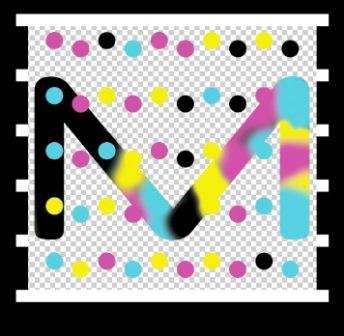
 Now that the image is separated you can start work. You will have four main colours that you have to work with, a black, cyan, magenta, and a yellow as are the colours of the dots. Be sure that the dots layer is above everything else because this with insure that the tag will work and will enable you to make sure that all the dots are ‘camouflaged’. Because I am going to add the magnetism M to the background and I will need to re-colour the M to make the dots blend in. By simply using a soft brush you can paint the different colours on the M to camouflage the dots that are in front. Once that is done be sure that the colours are contained within the character or object if they are not just erase any colours that are outside the object. Now you can start on m
 aking coloured shapes to camouflage the rest of the dots. This is done by using the ‘pen tool’ and by only using straight lines to draw around the dots. Anyhow with the shapes just be sure to cover all the dots in the image. After you have done that you should end up with something along the lines of this->
After a little bit of painting and some making of shapes the majority of the tag is finished. All that has to be done now is to put a black background in to cover up the rest of the dots.
One other thing that you can do is to add strokes of black along the edges of the shapes to add a better overlap effect and make the stand out more.
The link to the Microsoft Tag is: http://www.microsoft.com/tag/
And for a quick overview on custom tags: http://www.microsoft.com/tag/content/overview/CustomTags.aspx
Also follow this link for a video going over how to create a simple tag in PowerPoint and other programs: http://www.microsoft.com/tag/customtagvideo.aspx

