Bulk Hide Unused Fields from Users in Advanced Find in Microsoft Dynamics CRM 2015
Colin Maitland, 21 July 2015
When using Advanced Find the list of fields that are presented can be cluttered by the visibility of fields that are not used. Examples of these fields include Base Currency fields and many fields that are not displayed on Forms or Views.
In this blog I will demonstrate how to hide the unused fields from the lists displayed.
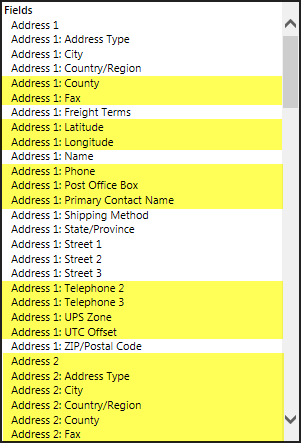
The following image shows some of the Contact fields displayed in Advanced Find. Those highlighted in yellow are not commonly used and are not displayed on any Contact forms.
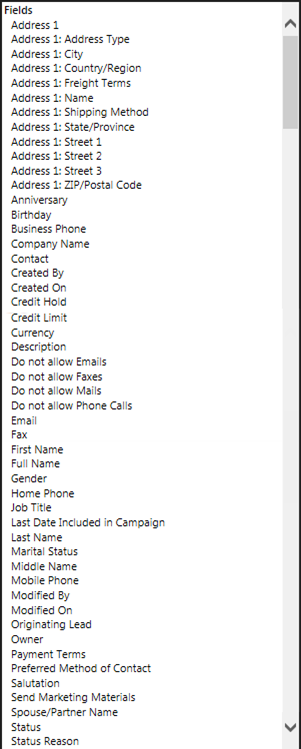
This next image shows a full list of Contact fields after the unused fields have been hidden. As a result, it is now easier for users to create Advanced Find searches and Personal Views for Contacts.
The following steps demonstrate how to hide the unused Contact fields from users by changing the Visible property of those fields in bulk to No.
- Navigate to Settings, Customizations

- Select Customize the System

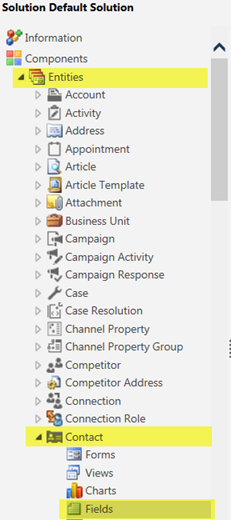
- From the Solution Explorer, expand the Entities branch, expand the Contact branch and select Fields.
- Optionally: Use the View selector above the Fields list to change the selected View from All to Customizable so that only customisable fields are displayed.

- Select all the fields on the currently displayed page that you want to hide from users in Advanced Find. Note: Hold-down the CTRL key to select multiple non-consecutive fields and use the scroll bar to scroll through the entire list of fields displayed on the current page.
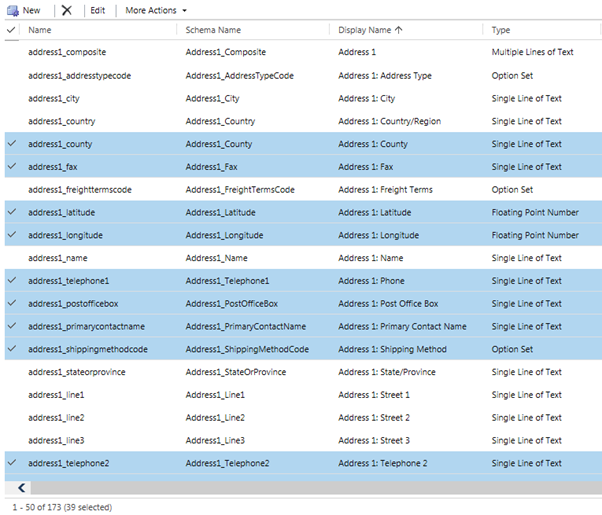
- Click Edit on the Command Bar.

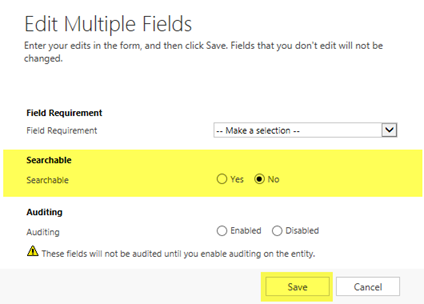
- From the Edit Multiple Fields dialogue set the Searchable option to No and then click Save. Do not select or change the Field Requirement or Auditing options.
- Use the Page controls to move to the next page.

- Repeat steps 5 to 8 for each page of fields until completed for all pages. Note: If you set the Records Per Page option on in the General tab in your Personal Options to a value such as 250 rather than the default of 50 you will not need to move through as many pages, if any.
- Optionally, select the Contact branch under Entities on the Solution Explorer Components tree and click Publish on the Command Bar, or alternately just click Publish All Customisations, on the Command Bar to publish the changes.


