

Microsoft Dynamics CRM 2013 Mail Merge
Colin Maitland, 16 December 2013
In Microsoft Dynamics CRM 2013 the locations from where users can complete a Mail Merge are slightly fewer than what they were in Microsoft Dynamics CRM 2011. In particular Mail Merges cannot be directly completed from Views and Forms as was the case in Microsoft Dynamics CRM 2011.
In this blog I will describe the locations in Microsoft Dynamics CRM 2013 from where users can no longer and can still complete a Mail Merge. I will also describe three step-by-step approaches for completing a Mail Merge when you starting point is a View.
Views and Forms
As previously mentioned, the option to complete a Mail Merge from a View such as a Main View, an Associated View or a Subgrid; or from a Form is no longer present.
In Microsoft Dynamics CRM 2011, users are able to complete a Mail Merge from these locations by selecting Mail Merge from the Add tab of the View or Form Ribbon Bar as shown in the following image.

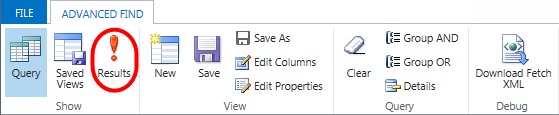
Advanced Find
Mail Merges may still be completed using Advanced Find. A Mail Merge button is located on the LIST TOOLS tab displayed after clicking Results on the ADVANCED FIND tab of the Ribbon Bar.

Marketing Lists
Mail Merges may still be completed from Marketing Lists. A Mail Merge on List Members option is located on the More Commands (…) menu on the Marketing List form.

Quick Campaigns
Mail Merges may still be completed using a Quick Campaign when using the Microsoft Dynamics CRM for Outlook Client and using either the Letter via Mail Merge or the Email via Mail Merge options. These Quick Campaign Wizard options are not available when using the Web Client.
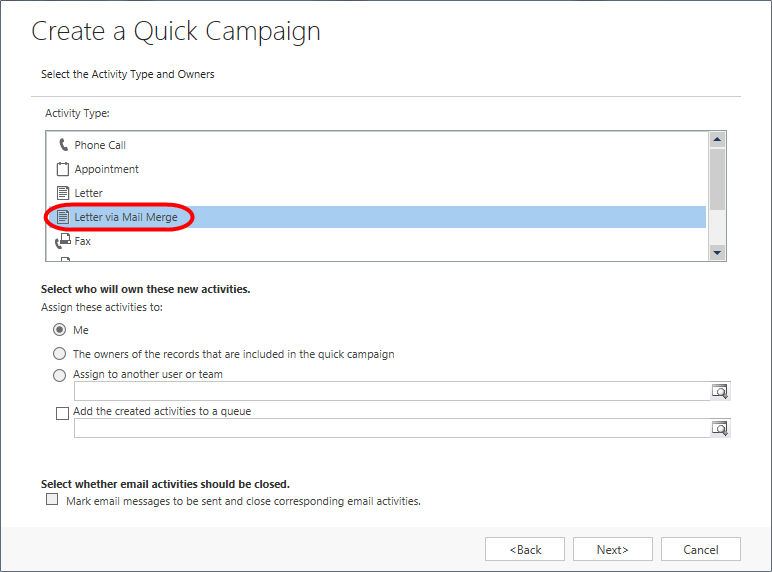
The following image shows the option to Mail Merge to Letter (i.e. Letter via Mail Merge) from a Quick Campaign.
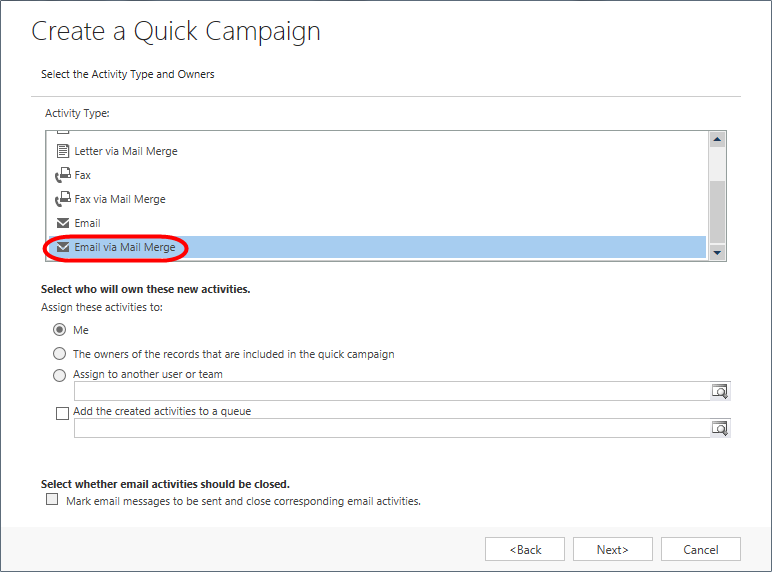
The following image shows the option to Mail Merge to Email (i.e. Email via Mail Merge) from a Quick Campaign.
Quotes
Microsoft Dynamics CRM still provides the ability to print a Quote using Mail Merge. A PRINT QUOTE FOR CUSTOMER button is located on the Command Bar of the Quote form.

In conclusion, some additional steps are required when using Microsoft Dynamics CRM 2013 if you want to complete a Mail Merge against one or more records selected from a View. The following provide three options for achieving this when your starting point is a View.
Option 1: Advanced Find
1. Select a View
2. Select Advanced Find from the More Commands (…) menu. By default the Advanced Find will be based on the selected View
3. Click Results on the ADVANCED FIND Ribbon Bar
4. Optionally select one or more records from the results list
5. Select Mail Merge from the LIST TOOLS Ribbon Bar
6. Use the Mail Merge Wizard to complete the Mail Merge
Option 2: Quick Campaign
1. Select a View
2. Select one or more records from the View
3. Select Quick Campaign from the More Commands (…) menu
4. Select either For Selected Records, For All Records on Current Page or For All records on All Pages from the Quick Campaign sub-menu
5. Use the Quick Campaign Wizard to create either a Letter via Mail Merge or an Email via Mail Merge Quick Campaign
6. Use the Mail Merge Wizard to complete the Mail Merge
Option 3: Marketing List
1. Select a View
2. Select one or more records on the View
3. Select Add to Marketing List from the More Commands (…) menu
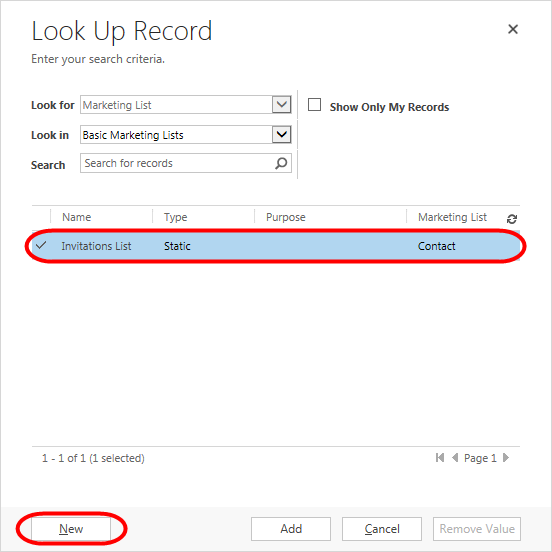
4. Select either an existing Marketing List or create a new Marketing List from the Marketing List Lookup Record dialog as shown in the following image:
5. Navigate to and open the Marketing List created and/or selected in the previous step
6. Select Mail Merge on List Members on the More Command Menu (…) on the Marketing List form
7. Use the Mail Merge Wizard to complete the Mail Merge
Category List

Filter by Author
Adam Murchison
Alfwyn Jordan
Arthur Mandisodza
Calum Jacobs
Colin Maitland
David Mochrie
Dominic Liu
Gayan Perera
Harshani Perera
Isaac Stephens
Jaime Smith
Jared Johnson
John Barrencechea
John Eccles
Lauren Withers
Paul Nieuwelaar
Roshan Mehta
Roz Millar
Ryan Blaikie
Ryan Ingram
Sarah Coleman
Sean Roque
Shalane Williams