

Using E-mail templates for quick campaigns in Dynamics CRM 2011
Vlad Arabajiev, 12 December 2011
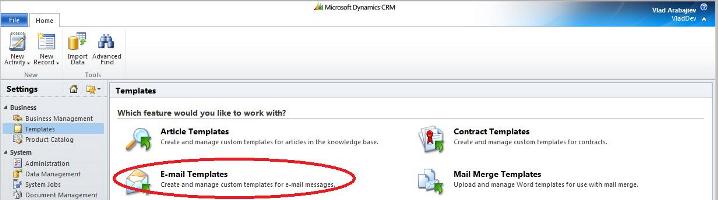
In this blog I will show how to create a quick marketing campaign and use an e-mail template for all participants in the campaign. It is important to design your e-mail template in such way that it looks personal. Potential customers need to feel appreciated and should be looked after with care. The more personal you make the e-mail template the more appreciated the customer will feel. To start open your CRM Environment go to Settings and click Templates then E-mail Templates and we are on the way.
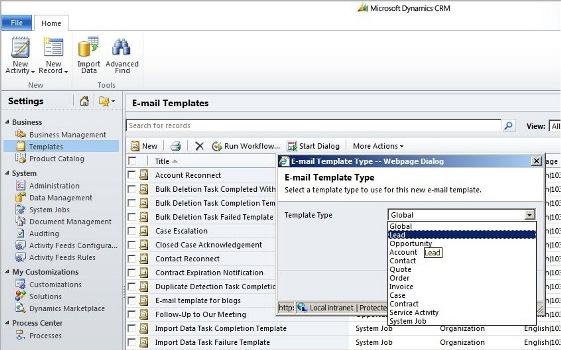
Once you hit New you will see that there are plenty of template types to create your template for i.e. all of these can be accustomed to your needs. In this case I will show you how to create a template for Leads. It is important to specify the right template because later once we start customizing the only dynamics values that we will pull through will be coming from the Lead Form.
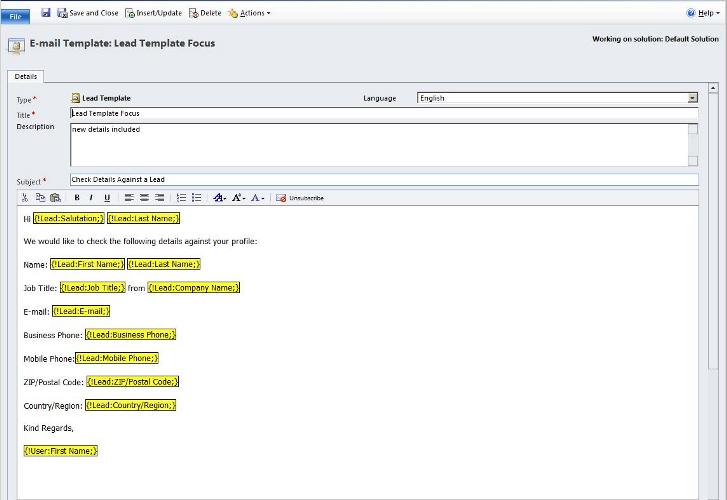
Now that we have created a new Lead Type template we need to give it a meaningful name, specify the Language, in our case we shall use English but if you have installed other Languages you can use them, Description is not mandatory but it is a good practise. Subject is compulsory field so make sure you give it a proper name. You notice the yellow coloured fields, these are dynamics values that we get by clicking the Insert/Update button.
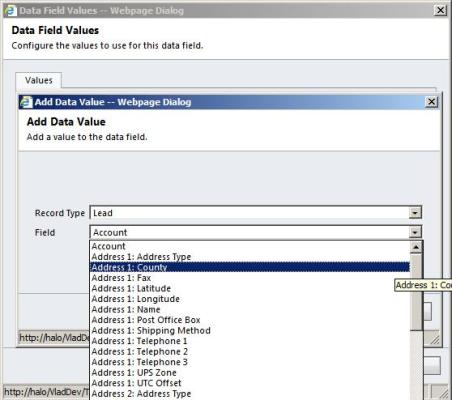
There are the steps here: Click Add
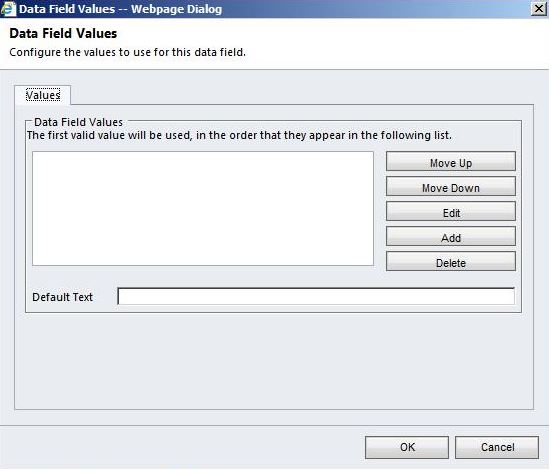
Then select Record Type: Lead, then pick your desired values.
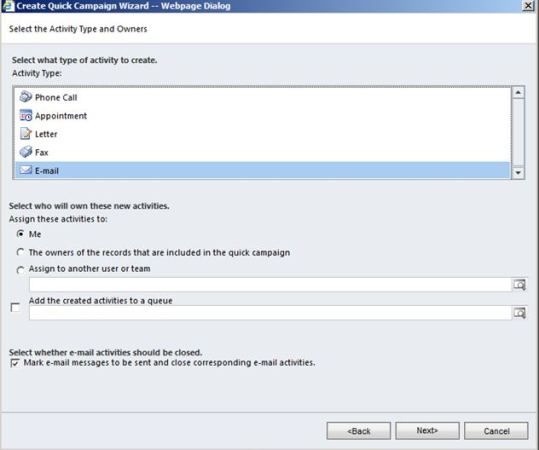
Once you have finished and are happy with your template hit Save and Close. Now we can proceed with our quick marketing campaign, so go to Sales the Leads and pick the Leads you would like to include in your campaign. Then go to the Add tab and select Quick Campaign for Selected Records. Then hit Next, give the campaign a meaningful name, then hit Next again. On this screen, select E-mail as the activity to be created, and assign these activities to yourself if your needs are different then you can pick other option, but the principle remains the same here.
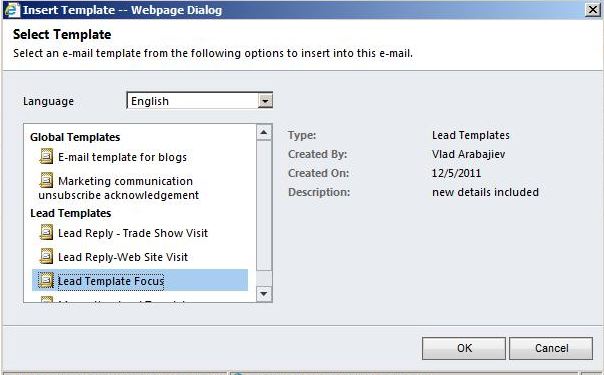
Now on the next page, on the very top check the Use Template box and specify from the Lead Templates the E-mail template we just created and click OK. Then click Next and finally Create.
The quick campaign is now created, go to Sales then hit Quick Campaigns and you should be able to see the E-mails created against the respective leads. Open one of them to check whether the dynamic values are valid.
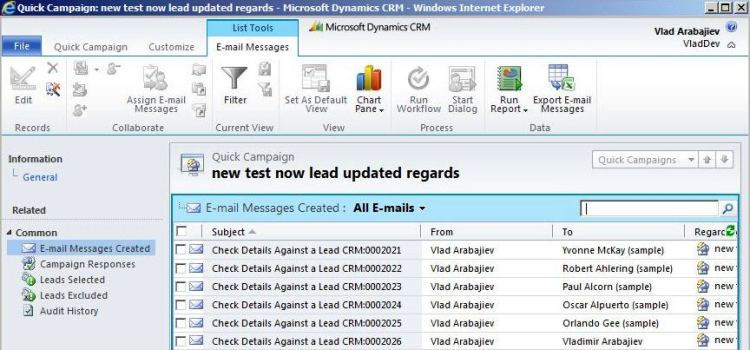
Let’s see the E-mail message:
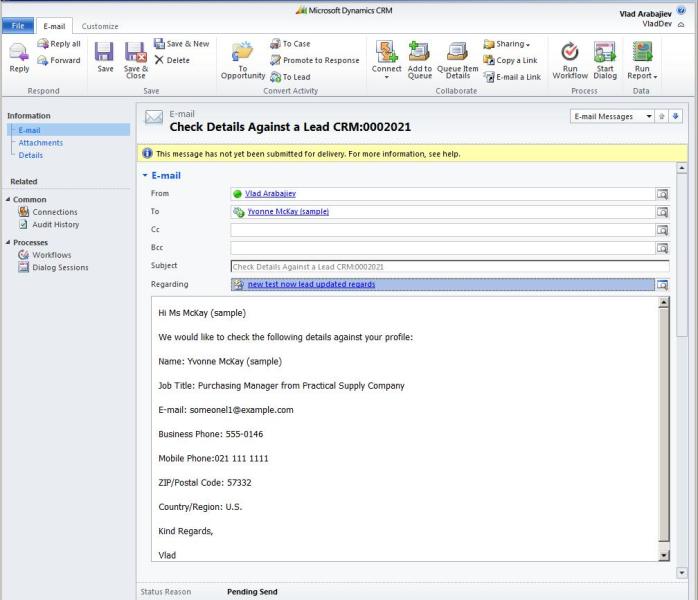
As we can see all the dynamic values are valid and are corresponding to the details that we have against this lead record. It is important to note when designing custom E-mail templates for a Lead, Account, Contact or other record type that you have entered all the relevant information against the records i.e. First Name, Last Name, Salutation etc.
If we fail to do so, once we specify the dynamic values and go to create the E-mail message from the template there will be empty space on every dynamic value where the corresponding fields for a particular record have been left blank.
I hope this blog will come helpful and was easy to follow. Next time we will look at some other options we have with creating custom E-mail templates, like attaching files and incorporating images.
Category List

Filter by Author
Adam Murchison
Alfwyn Jordan
Arthur Mandisodza
Calum Jacobs
Colin Maitland
David Mochrie
Dominic Liu
Gayan Perera
Harshani Perera
Isaac Stephens
Jaime Smith
Jared Johnson
John Barrencechea
John Eccles
Lauren Withers
Paul Nieuwelaar
Roshan Mehta
Roz Millar
Ryan Blaikie
Ryan Ingram
Sarah Coleman
Sean Roque
Shalane Williams