

Set a Time Stamp on Activities in Dynamics CRM 2011
Paul Nieuwelaar, 13 October 2011
In Dynamics CRM 2011, when I am entering phone call activities or tasks I often find that I am updating the same activity multiple times. As a result of this I end up needing to enter in the date and time before each update to the description in order to keep a ‘time stamp’ of when each change was done. After a bit of thought, I decided to automate this ‘time stamping’ process using a little bit of JScript.
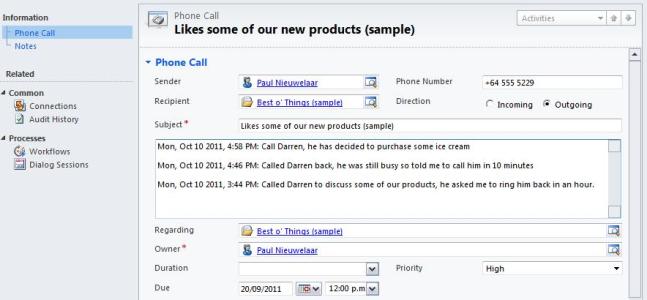
The goal was to be able to load an activity, and have the current date/time prefilled into the description field, along with the previous conversation below. Using the following block of JScript, I was able to achieve this.
function setTimeStamp(description) {
var isCreateForm = Xrm.Page.ui.getFormType() == 1;
var isUpdateForm = Xrm.Page.ui.getFormType() == 2;
// Only run on Create or Update, not when viewing a disabled record
if (isCreateForm || isUpdateForm) {
// If a description field isn't provided use 'description' as a default
if (description == null) { description = "description"; }
var todaysDate = new Date();
var descriptionField = Xrm.Page.getAttribute(description);
var descriptionValue = descriptionField.getValue();
// Set the time stamp format: Mon, Oct 03 2011, 6:15 PM
todaysDate = todaysDate.format("ddd, MMM dd yyyy, h:mm tt");
// Set the time stamp, and copy the exisitng value down
descriptionField.setValue(descriptionValue == null ? (todaysDate + ":") : (todaysDate + ": \n\n" + descriptionValue));
}
}
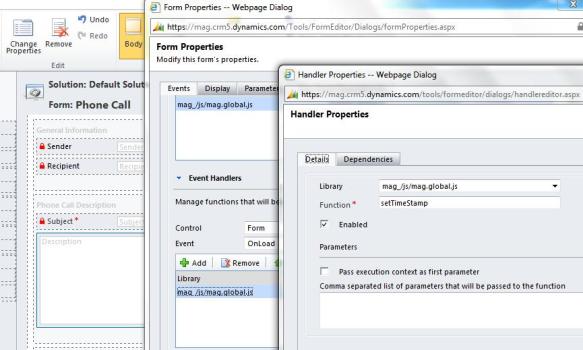
Simply create a new web resource, and add this code into the library. You will need to call this function on each entity you want the time stamp to work on. In regards to activities that use a ‘description’ field, you do not need to enter any parameters. However if you have a custom entity or field you want this to run on, you will just need to pass in the description name into the list of parameters, for example “mag_description”.
Using the code above, the time stamp will be set in the following format: Mon, Oct 03 2011, 6:15 PM. If however you want to change this format you can simply change the 12th line which sets the date format. I have added a table below listing all the different date formats for customizing your own time stamp. You can use these with any combination of commas, spaces, dashes or slashes to form your desired date format.
Example Date: Thursday, September 06 2011, 8:07:09 PM
Format Used: dddd, MMMM dd, yyyy, h:mm:ss tt
| Format | Description | Example/Output |
| dddd | Full day of the week name | Thursday |
| ddd | 3 letter abbreviated day of the week name | Thu |
| dd | Day of the month as 2 digits (1-9 prefixed with 0) | 06 |
| d | Day of the month as 1 digit (with no prefixed 0) | 6 |
| MMMM | Full month name | September |
| MMM | 3 letter abbreviated month name | Sep |
| MM | Month number as 2 digits (1-9 prefixed with 0) | 09 |
| M | Month number as 1 digit (with no prefixed 0) | 9 |
| yyyy | Year as 4 digits | 2011 |
| yy | Year showing only the last 2 digits | 11 |
| hh | Hours as 2 digits (1-9 prefixed with 0) – 12 hour time | 08 |
| h | Hours as 1 digit (with no prefixed 0) – 12 hour time | 8 |
| HH | Hours as 2 digits (1-9 prefixed with 0) – 24 hour time | 20 |
| H | Hours as 1 digit (with no prefixed 0) – 24 hour time | 20 |
| mm | Minutes as 2 digits (1-9 prefixed with 0) | 07 |
| m | Minutes as 1 digit (with no prefixed 0) | 7 |
| ss | Seconds as 2 digits (1-9 prefixed with 0) | 09 |
| s | Seconds as 1 digit (with no prefixed 0) | 9 |
| tt | AM or PM based on 12 hour time | PM |
Once you have selected your format simply change the 12th line containing the default format to your new selection. Finally after adding this to your activity entities and publishing customizations you will be able to start using the time stamps.
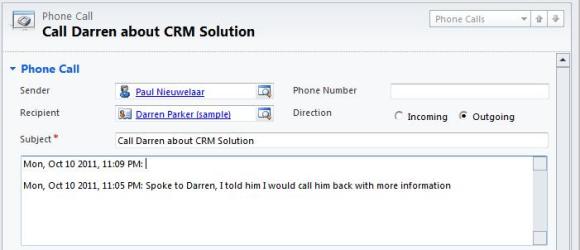
When you create a new activity, the description will now be prefilled with your time stamp, and when opening existing activities the previous details will be kept underneath the corresponding time and date stamp.
Category List

Filter by Author
Adam Murchison
Alfwyn Jordan
Arthur Mandisodza
Calum Jacobs
Colin Maitland
David Mochrie
Dominic Liu
Gayan Perera
Harshani Perera
Isaac Stephens
Jaime Smith
Jared Johnson
John Barrencechea
John Eccles
Lauren Withers
Paul Nieuwelaar
Roshan Mehta
Roz Millar
Ryan Blaikie
Ryan Ingram
Sarah Coleman
Sean Roque
Shalane Williams