Configuring Dynamics CRM 2011 for Document Management
Roshan Mehta, 14 April 2011
In my previous post, I gave you a quick overview of the new Document Management feature available in Dynamics CRM 2011. Today, I will take you through the simple process of configuring your CRM 2011 instance to integrate with SharePoint 2010.
Configuring an Entity for Document Management
Firstly, it is important to define which entities are to be available for Document Management. Here I will show you how to check if the Account entity has been configured for Document Management.
1. Click on Settings and then click on Customizations.
2. Click on Customize the System.
3. Expand Entities and then click on Account.
4. Ensure that Document Management is checked.
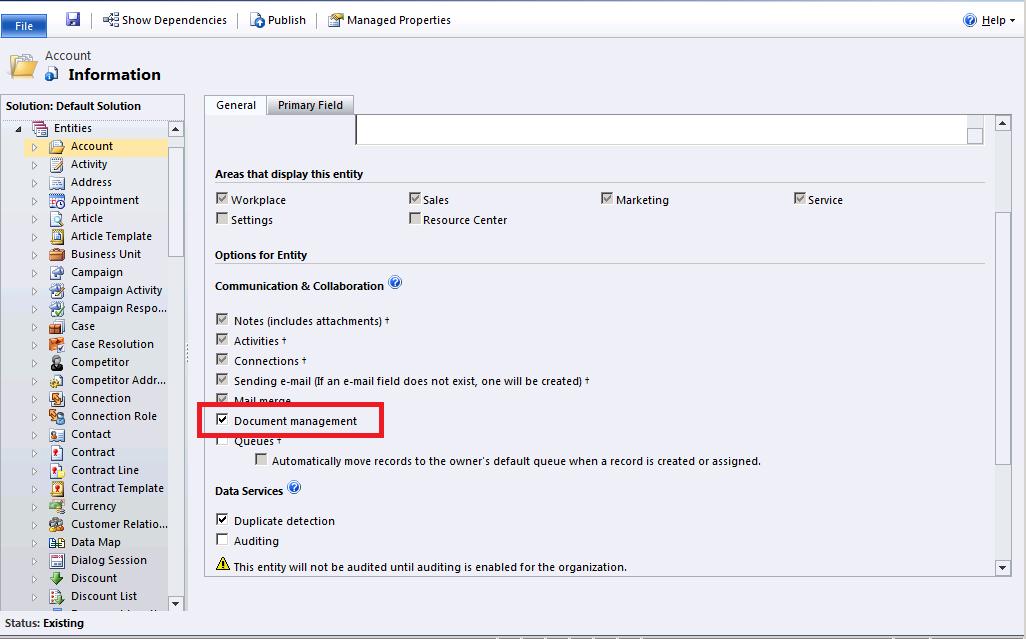
Downloading the SharePoint List Component
1. Click on Settings and then click on Document Management.
2. Click on Install List Component. This will take you to the Microsoft Download Centre.
3. Click on Download and then click on Run.
4. Click on Run.
5. Accept the Microsoft Software License Terms and then click on Continue. You will be prompted to select a folder to store extracted files.
6. Expand Computer and then expand Local Disk (C:)
7. Click on Make New Folder and call it SharePoint List Component.
8. Click on OK.
9. Once the installation is complete, click on OK.
Installing the SharePoint List Component
Next we need to install and activate the List Component inside SharePoint 2010.
1. Run Windows PowerShell.
2. Navigate to the SharePoint List Component folder we created previously.
3. Enter the following command. Note: The URL specified is the URL to your SharePoint site.
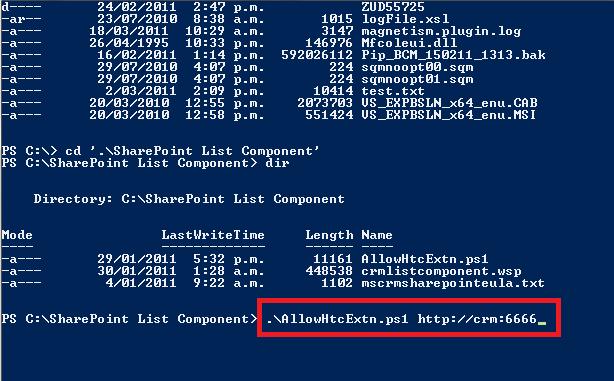
4. After this command is executed, you will need to reset IIS using the command iisreset /noforce.
5. Navigate to your SharePoint Site in Internet Explorer.
6. Click on Solutions under the Galleries menu.
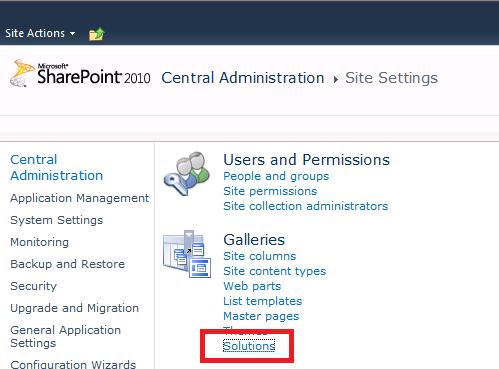
7. On the ribbon, click on the Browse tab, and then click on the Solutions tab.
8. Click on Upload Solution.
9. Click on Browse and navigate to the SharePoint List Component folder we created earlier.
10. Select the file crmlistcomponent.wsp and click on Open.
11. Click on OK.
12. Click on Activate. You will see the list component in the list of activated solutions.
Creating Folders in SharePoint
Here’s where the magic happens! CRM 2011 will automatically create folders inside SharePoint related to each entity you have configured for Document Management.
1. Navigate to Settings and then click on Document Management.
2. Click on Document Management Settings.
3. Select the entities you wish to create document folders for.
4. Specify the URL to your SharePoint Site.
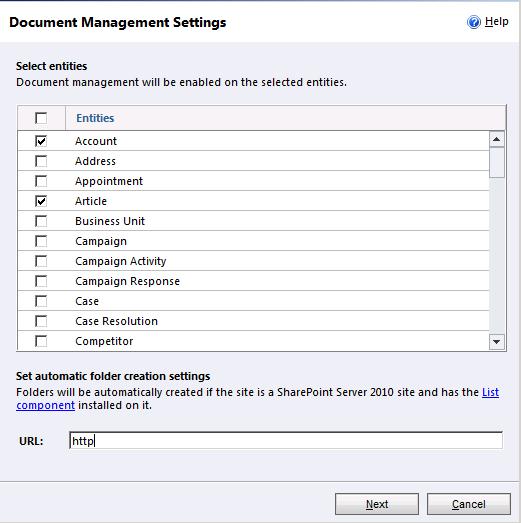
5. Click on Next. Note: Dynamics CRM 2011 will notify you if the URL you have entered is not a valid URL to a SharePoint Site.
6. The next window allows you to define the folder structure. Select Based on Entity to define the entity name as the parent folder.
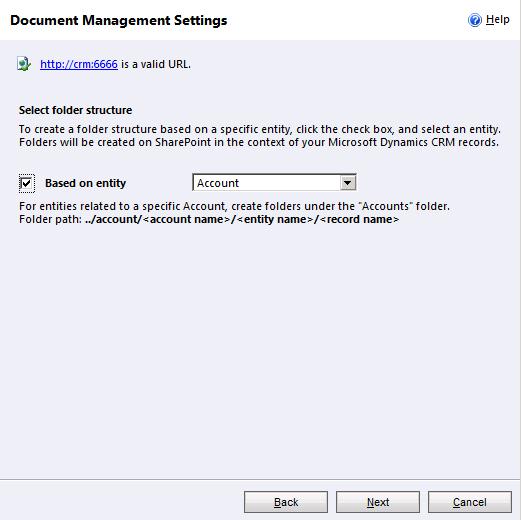
7. Select the entity to use as the parent folder.
a. Account Centric – The Account entity will be the parent folder.
For example, if you have a Contact “Frosty Stevens” who belongs to the Account “Frosty’s Ice Cream Store”, the folder structure will be /Account/Frosty’s Ice Cream Store/Contacts/Frosty Stevens.
b. Contact Centric – The Contact entity will be the parent folder.
For example, if you have an Opportunity called “100 Ice Cream Cones” for a Contact “Frosty Stevens” , the folder structure will be /Contact/Frosty Stevens/Opportunity/100 Ice Cream Cones
c. Entity Centric – The entity you are working with will be the parent folder.
8. Click on Finish. This will automatically create folders inside SharePoint.
That’s all there is to it! In my next post, we will see Document Management in action!

