

How to Insert an Image into your Dynamics CRM Article
Paul Nieuwelaar, 15 March 2011
If you’ve been reading some of my previous blog posts on Creating Articles in Dynamics CRM 2011, then you should know how to create some quality Articles in Dynamics CRM 2011. You can create informative articles that customers will be able to follow, however often you want to add an image into your article to emphasise a point, or show a step in a procedure. While at first glance it seems there is no way to add an image using the format tools, there is a workaround that you can use.
Note: Before you can add images to your article you need to have somewhere that you can upload images to and access them online (this can be your CRM server).
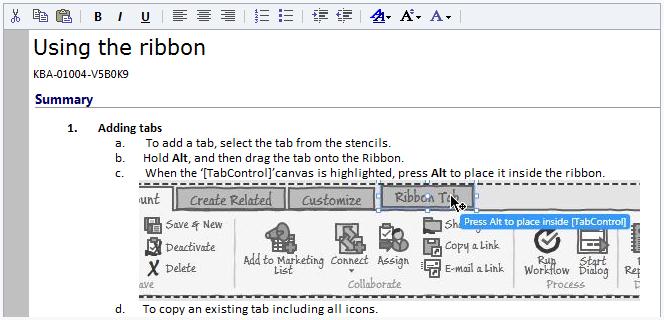
First you need to create your article. As you are writing the article, leave spaces where you want the images to go.
Next you need to pick out the images you will be using, and upload them somewhere. Then navigate to the uploaded images in a new Internet Explorer window (for example ‘http://servername/images/img1.jpg’).
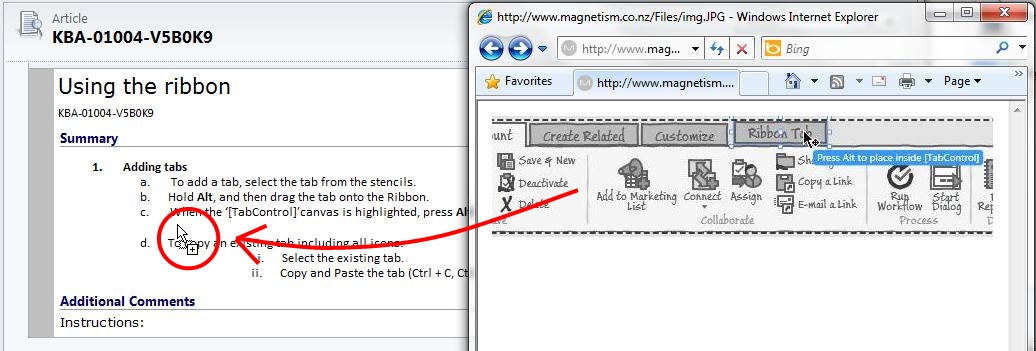
To add the images to the Article, get the Internet explorer windows side by side, and click and drag the image into the article where you want it to go.
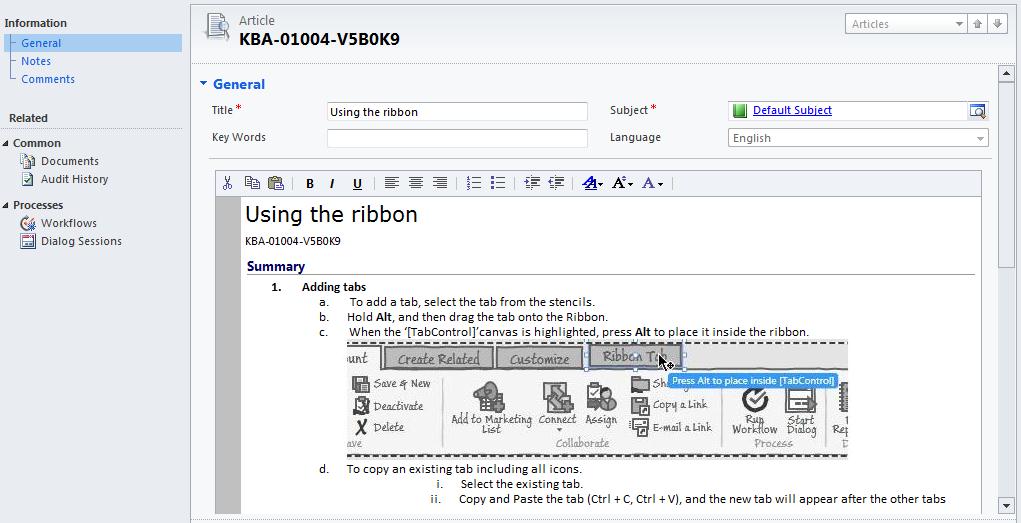
The image will then be added into the article. If at first the image doesn’t appear right, save the article and then it will display correctly.
The reason you need to upload the image is that if you simply use an image from your computer, the image will appear correctly in the article, but after saving the article the image will not be displayed.
That’s all there is to it, your articles will now look more professional, and customers will be able to follow them easier. In my next blog post I will be showing how to search for Articles in Dynamics CRM 2011.
Category List

Filter by Author
Adam Murchison
Alfwyn Jordan
Arthur Mandisodza
Calum Jacobs
Colin Maitland
David Mochrie
Dominic Liu
Gayan Perera
Harshani Perera
Isaac Stephens
Jaime Smith
Jared Johnson
John Barrencechea
John Eccles
Lauren Withers
Paul Nieuwelaar
Roshan Mehta
Roz Millar
Ryan Blaikie
Ryan Ingram
Sarah Coleman
Sean Roque
Shalane Williams