

Creating and Editing an Article Template in Dynamics CRM 2011
Paul Nieuwelaar, 04 March 2011
In my previous post on Creating an Article in Dynamics CRM 2011, I showed how you can create an Article, and I showed the default article templates, and what they are used for. In this post I will be showing how you can create your own Article Templates, and even edit the default ones.
To create or edit an Article Template, navigate to Settings, and click on Templates under Business. From the Templates area, click on Article Templates, and you will see a list of the Active Article Templates.

To edit an existing Article Template, double click the desired template to open it.
Or, if you would like to create a new Article Template, click ‘New’ from the Actions menu.
If you create a new template, you will be prompted to enter a Title, Description, and Language for the Article Template. Click Ok, and then you can start adding sections.
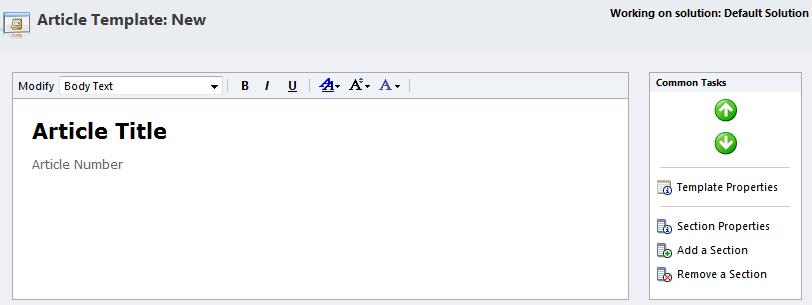
To add a section click the ‘Add a Section’ button on the right. Give it a Title – this will be displayed at the top of the section. If required set some instructions for the section. If you add more than one section, you can use the up and down arrows to rearrange them.
You will also notice you can modify the style of the template, by using the tools at the top of window. Using these you can change the font, size, and colour of the Body text, Title text or Section heading.

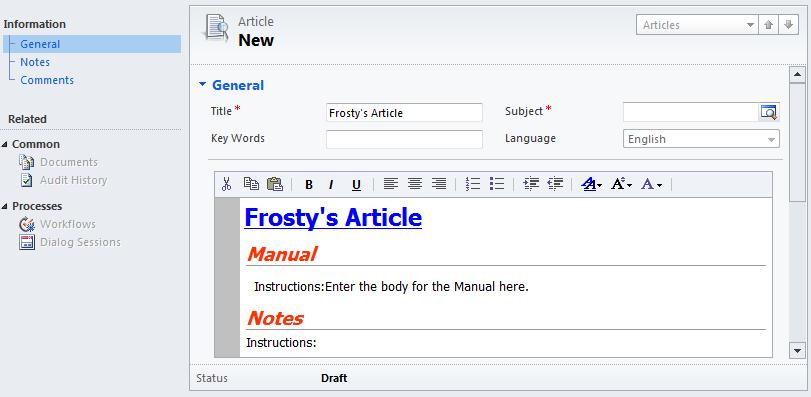
Once you are satisfied with your template, click Save and Close. To preview your changes, create a new Article by going to Workplace or Service, clicking Articles, and then clicking New.
Select the Article Template you have been working on, and then click ok. The Article will now be formatted with the sections and styles you set in the Article Template.
In my next post I will be showing what to check for when approving an Article. Stay tuned until then.
Category List

Filter by Author
Adam Murchison
Alfwyn Jordan
Arthur Mandisodza
Calum Jacobs
Colin Maitland
David Mochrie
Dominic Liu
Gayan Perera
Harshani Perera
Isaac Stephens
Jaime Smith
Jared Johnson
John Barrencechea
John Eccles
Lauren Withers
Paul Nieuwelaar
Roshan Mehta
Roz Millar
Ryan Blaikie
Ryan Ingram
Sarah Coleman
Sean Roque
Shalane Williams