Microsoft Dynamics CRM 2011 Dashboarding 101
Simon Phillips, 12 October 2010
In Dynamics CRM 2011 out of the box they are allowing creation of Dashboards. They have made the creation of them really user friendly and easy which is why they are allowing users to create dashboards on the fly as they see them to need one. In Dynamics CRM 2011 they supply seven generic dashboards out of the box showing sales history and sales performance. However, if you are wanting a more technical dashboard, or are wanting to combine a couple of graphs from different dashboards into one so that they are all viewable without changing, this can be done very easily.
I am now going to step you through the basic process of creating a Dashboard;
1. Navigate to Dashboards in Workplace.
2. On the Ribbon click on New.
3. The following dialog box will open
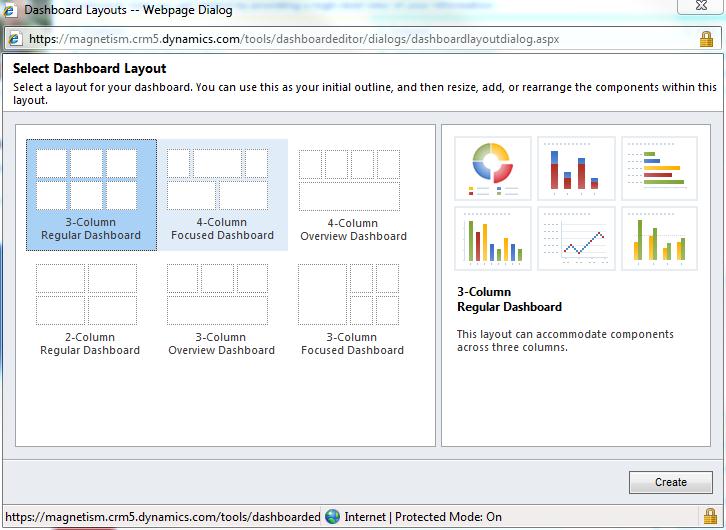
4. Select the format you want your dashboard to follow. (If what you desire isn’t there just pick any as long as it has the right number of elements)
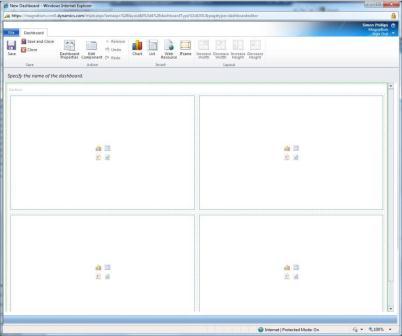
5. Now with the above open specify a name for the dashboard.
6. If you wish to change the layout of how the dashboard looks there are 4 buttons that will help you do this

7. Now that your dashboard looks how you want it to you will find 4 buttons inside each element.
a. Chart ![]()
b. List ![]()
c. IFrame ![]()
d. Web Resource ![]()
8. First of all I’ll explain
9. Chart:
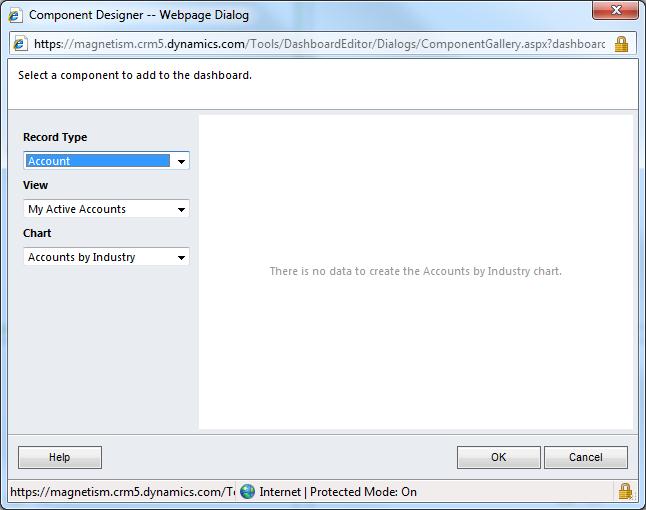
a. In the above dialog box you have 3 drop down options
i. Record type: This of course will determine the type of records that display on the chart.
ii. View: This will determine the view that will be used on the chart.
iii. Chart: This is how you want the chart to filter.
10. List:
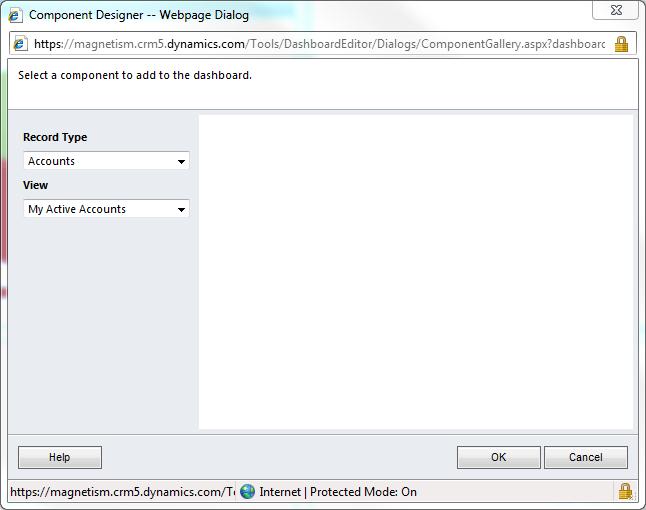
a. In the above dialog box you have 2 drop down options
i. Record type: This of course will determine the type of records that display in the list.
ii. View: This will determine the view that will be displayed in the list.
11. IFrame:
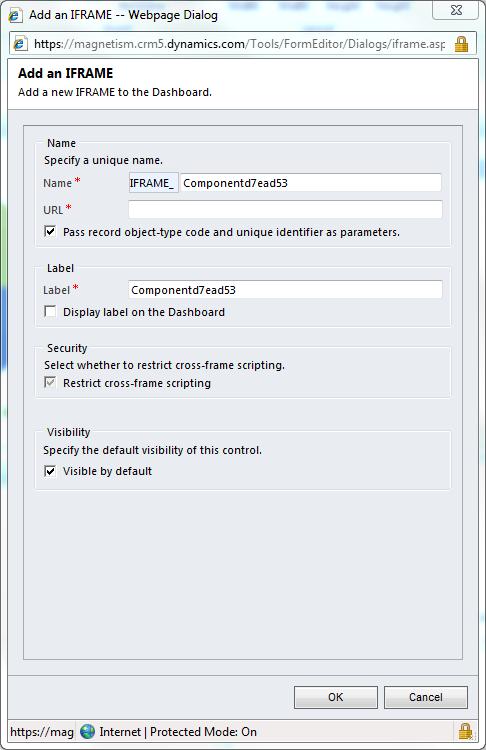
a. You may recognise the above dialog box from form customizations adding an IFrame and it works the same way
i. Name: The name of the IFrame. (Needed if you want some java script to do something to it)
ii. URL: The URL of the website to display in the IFrame.
12. Web Resource:
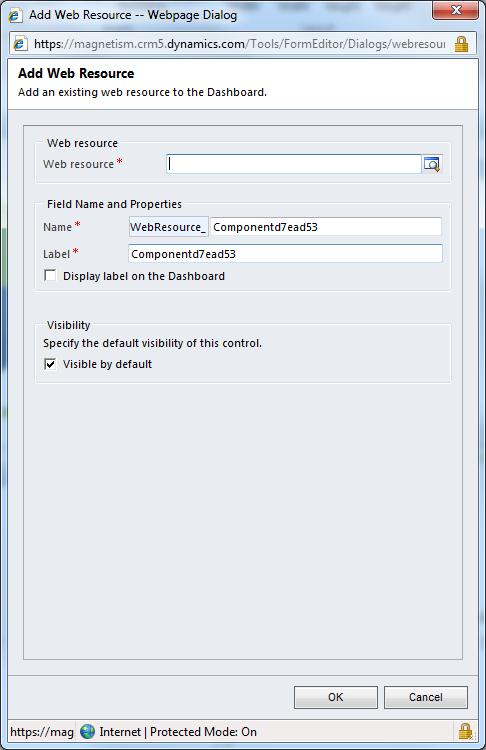
a. Click on the Web Resource look up
b. Select the web resource that you are wanting to add.
c. Give the web resource a name
d. Please Note: In a dashboard, you can only add Web resources of the following types: HTML, Silverlight, PNG, GIF, JPEG, ICO.
13. Save and close the dashboard
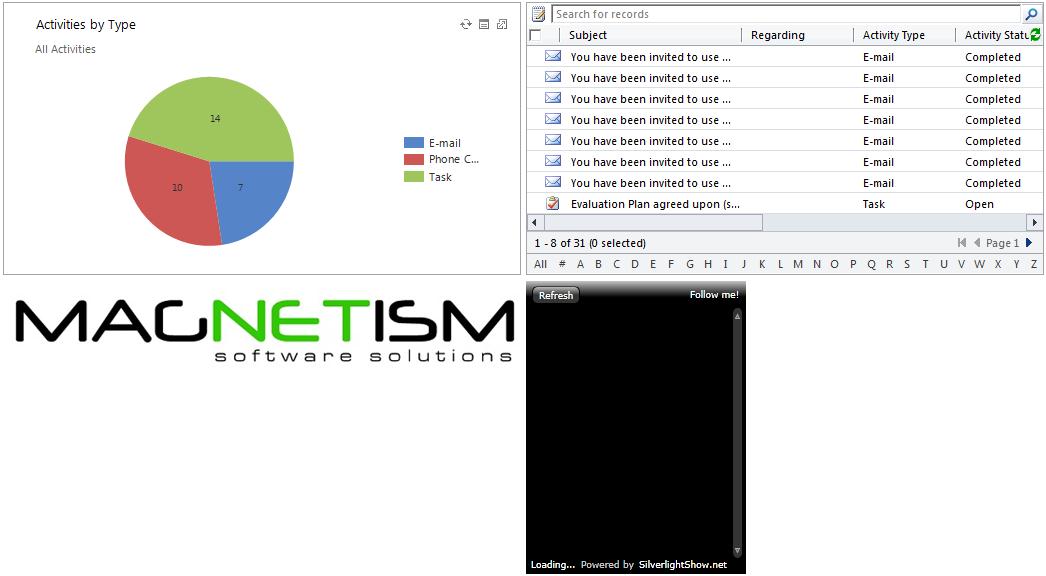
Here is the final outcome of the dashboard. In my next blog post I will be going over Web Resources in more detail.

